

Papillon – French for butterfly y someone brilliant and versatile. Well! I would not say I am “brilliant” but I do enjoy my time spent crafting pretty things. Perhaps its more like I possess a certain je ne sais quoi (I-don’t-know-what). Googled Francaise aside- it makes for a great quilt theme, perhaps better than the longarm lady who described the pattern as “solo cups”.

Papillon Afternoon is inspired by a sleepy dog (I spy….) and a simple pattern in one of my Lintott quilting books for precut collections, titled “Tumblers”, that I modified a bit, particularly the angle is more dramatic (leaves bigger scraps for its 2nd iteration) and three borders to really highlight my favorite print from the Moda Papillon line. Layers cakes are great, especially if you love to just nibble on the whole line. They are easy to work worth and there lots of patterns designed around them. However, they are in no way necessary. For this pattern, I would suggest if you are not using a layer cake to first cut the fabric in to the layer cake square size (10 x 10 inches) and then trim to the trapezoid shape. This is a pretty easy quilt pattern, perfect for beginners. You can adjust the size by adding larger, smaller or fewer borders.

Papillon Afternoon
- Finished size approx. 60 x 72 inches, seams are ¼ inch
Supplies
- 42 – 10 x 10 inch squares (one layer cake pack)
- 1 yard coordinating fabric for inner and outer 2″ borders
- 1 yard coordinating fabric for wide 4 ½ inch middle border
- ½ yard coordinating fabric for optional set in corners and binding
- 4-5 yards fabric for backing (depending on how you prefer to finish)
- Batting, thread, rotary cutter, ruler etc
Instructions
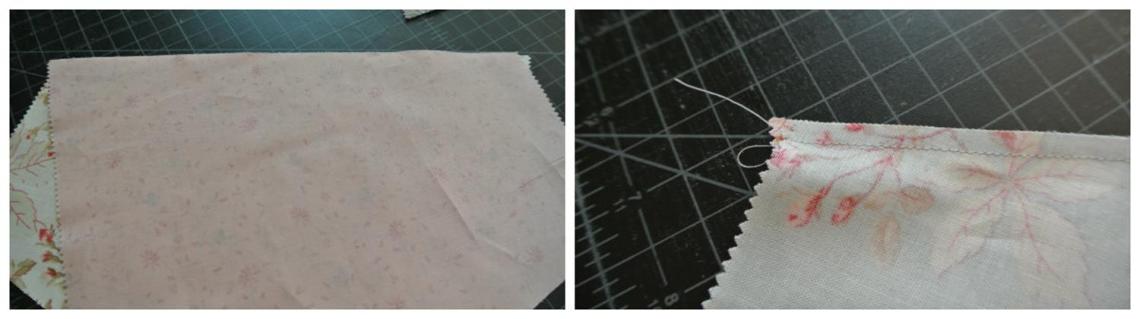
- To make cutting the trapezoids easier I created a template with tape on my cutting mat. For each 10 x 10 inch square, I cut from the lower corner to a point 3 inches from the upper corner on the right-hand side (right side facing up), then flip the fabric over (right side down) and do the same cut again, leaving you with a trapezoid shape, where the top is 4 inches wide and bottom is the original 10 inch width. You can cut two at a time, but not much more as you will lose accuracy. I also made sure that my stripes were all running horizontal and that butterflies were right side up BEFORE cutting.

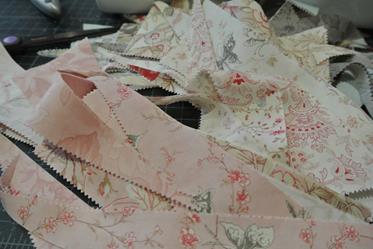
- Look at these yummy scraps! Can’t wait to use them.
-
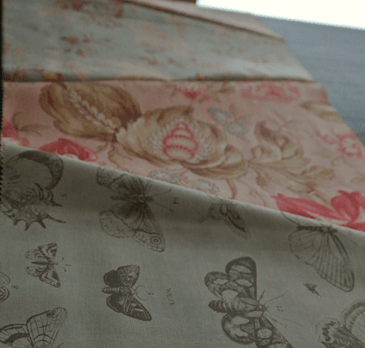
I sorted my trapezoids (aka convex quadrilaterals) by color to make the layout step easier. I also declared my “rules”. For example: fabrics need to be right side up, no upside down butterflies and no two of the same print, even if different color, touching.

- Layout the pieces making 6 rows with 7 pieces each. Rearrange them until you are happy with the color balance, pattern etc.

-
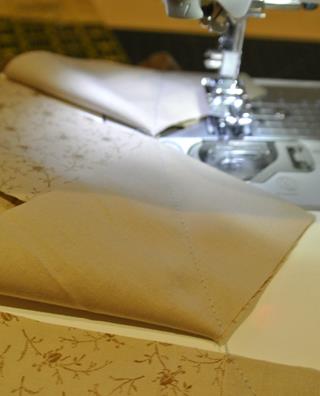
Sew together each row. The tricky part is that you need to line up the pieces and create a “dog ear” (about ¼ inch) on each end so that when you open up the pieces they are even along the bottom. This is because you are sewing at an angle and the pieces alternate having the wide part on top.
-
Once you have a row assembled, give it a good iron. Press the seams all in one direction. When you press the next row, press the seams in the opposite direction. This will help you line up corner seams.
- After you have sewn all the rows together, it is time to join them together. Pinning to line up the seams. Give it a good press when done.
-
Time to square up the edges! Using a long ruler and rotary cutter, trim the right and left side of the quilt to make it a straight edge. Then you are ready for some borders.

- Remember that you can make the quilter bigger or smaller by changing the borders. You might just like the quilt the way it is without borders, making it a cute baby size. Just go for it!
-
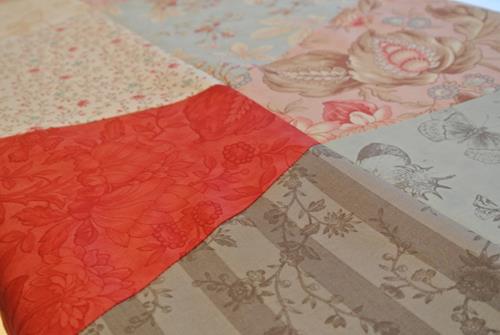
For the larger size, there are three borders: 1st Border: cut 6 strips WOF x 2 ½ inches 2nd Border: cut 7 strips WOF x 5 inches wide. If adding in the contrasted corner piece, you will only need to cut 6 strips WOF and 4 5 x 5 inch squares contrast (I used the blue and white stripe). 3rd Border: cut 7 strips WOF x 2 ½ inches wide. Here is a picture (after it is all done) showing the borders up close.

- For each of the borders you will want to join the strips end to end. I prefer to join the pieces on the diagonal, but you can sew them end to end as well. Begin to sew them to the main portion of the quilt, starting at the top edge of the quilt and either work your way around clockwise, like doing a log cabin, or sew top then bottom then the longest pieces for each side. I did a little bit of both. For borders 1 and 3, I did them clockwise but for the wide butterfly border #2, I did them each separate so that I could attached the contrasting corner (sew top strip, sew bottom strip, measure the long side, add ½ inch for seams then trim the long strips to length, sew on 5 x 5 inch square to both ends and viola!).
- Once all the borders are attached you are basically done! Nice work. Now give it a good press, prepare the backing, batting, binding (cut 7 WOF x 2 ½ inch strips, join, press in half the long way) and either quilt it yourself or take to the long arm lady. I had this quilt professionally done as it is being donated to a charity event and I just frankly do not enjoy the process. J

This pattern will definitely be recreated as it was fun and easy and a great way to showcase larger prints. Next up is to bust up some of larger stash pieces by cutting up my own “layer cake”.

