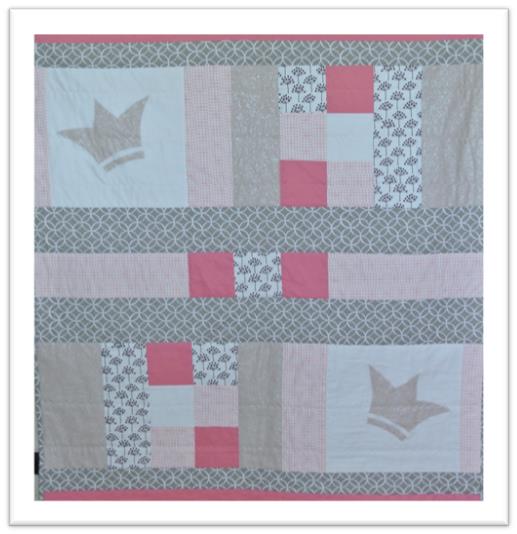
Fit for royalty and inspired by a soon to enter the world Baby Girl King, I designed this simple but darling baby quilt featuring a sparkly crown and soft modern tones. The pattern is simple with the most challenging part being choosing your color and drawing the crown. This can easily be made with a variety of color schemes, fabric remnants and the applique accent can be modified to just about anything: nursery theme, favorite animal or name. While I state this is easy, I don’t provide you with specific instructions for some of the basics, like ironing (just do it, don’t get weird of which direction), applique, quilting the sandwich and binding. There are some really great tutes out there that cover these steps.


Instructions:
1. Think about your color scheme and how much fabric you have available. I had five fabrics, most ¼ or ½ yard cuts with the most out of the concentric circle pattern. In the photo above you can see a key at the bottom for how many strips of each I cut and in the drawing the finished dimensions. Sew with a ¼ inch seam. Here are the pieces and blanks for you to denote your fabric choices
- 2 ½ x 40 inch (WOF) #2 : taupe circles ____________________
- 4 ½ x 12 ½ inch #2: white with brown floral ________________
- 2 ½ x 12 ½ inch #2: pink checkers _______________________
- 4 ½ x 12 ½ inch #2: pink checkers _______________________
- 4 ½ x 12 ½ inch #2: pink checkers _______________________
- 6 ½ x 12 ½ inch #2: tan sparkles ________________________
- 4 ½ x 12 ½ inch #2: tan sparkles ________________________
- 4 ½ x 40 inch (WOF) #2: taupe circles ____________________
- 12 ½ x 12 ½ inches #2 : off-white _______________________
- 2 ½ x 40 inch (WOF) #2: solid pink ______________________
- 4 ½ x 4 ½ inch # 3: tan sparkles ________________________
- 4 ½ x 4 ½ inch # 4: pink checkers _______________________
- 4 ½ x 4 ½ inch # 6: solid pink __________________________
- 4 ½ x 4 ½ inch # 2: off-white __________________________
- Fabric for binding. You could use up scraps in 2 ½ inch width and varying lengths or full pieces.
- Fabric for backing: need something that is at several inches bigger all the way around than the final measure of 40 x 64 inches
- Batting – I pieced some large remnants together using a zig zag stitch to join

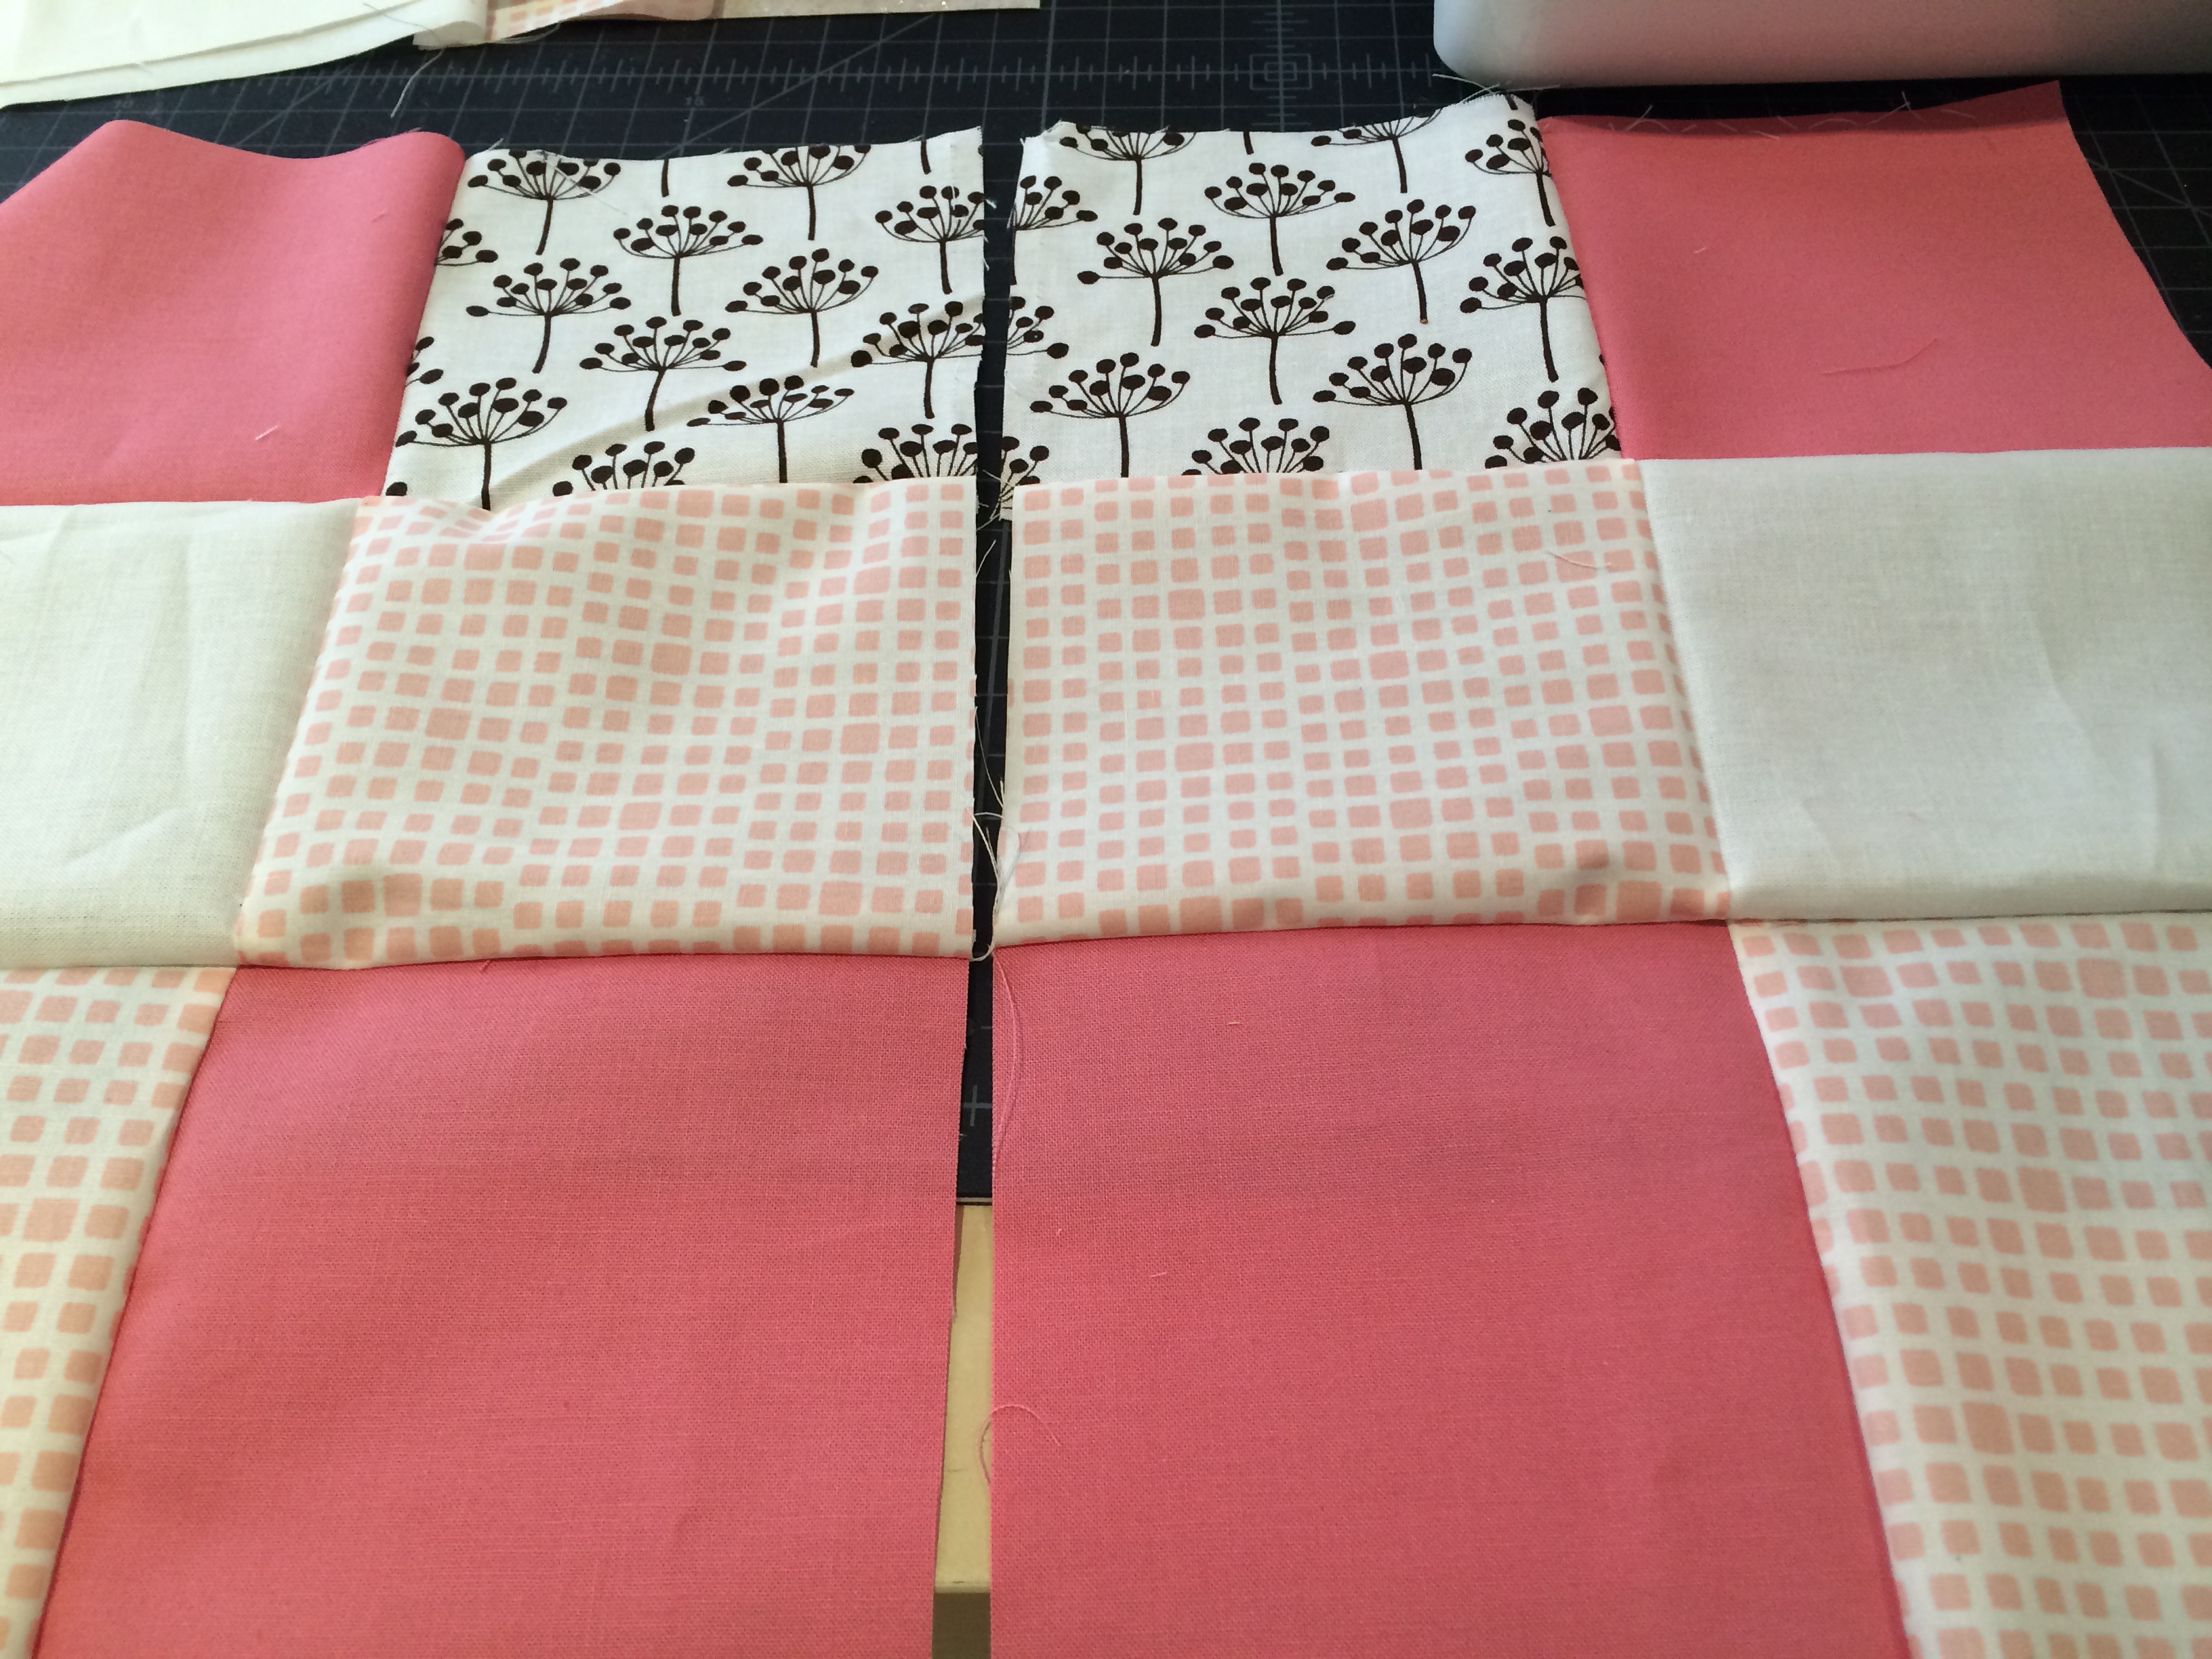
2. Assemble the 4 ½ inch squares to form two 8 ½ x 12 ½ rectangles. One for top half and one for bottom half of quilt. Sew the remaining three squares end to end to form a horizontal strip 12 x 4 ½ inches for the middle of the quilt.
3. Working left to right: Sew a 12 ½ x 2 ½ inch strip to the 12 ½ inch square. Then sew two of the 4 ½ x 12 ½ strips to the other side of the square. Sew on the 8 ½ x 12 ½ piece and then sew another 4 ½ x 12 ½ strip and a 6 ½ x 12 ½ piece (sparkles!!)

4. Repeat step three only this time work in reverse, from right to left, starting with a 12 ½ x 2 ½ inch strip sewn to 12 ½ inch square etc etc.

5. For the middle three rows: sew one of the 4 ½ x 14 ½ strips on each side of the three –squares piece from step one. Now sew a 4 ½ x WOF strip (circles) to the top of this piece and the bottom. This creates the middle section that is 12 ½ x WOF.

6. Attach the top 12 ½ inch row to the middle and then sew on the bottom. Almost done!
7. Sew on the outer strips by attaching 2 of the 2 ½ x WOF strips to the top and the bottom of the quilt top. For my quilt these were the dark solid pink (on the outside) and the taupe circles.

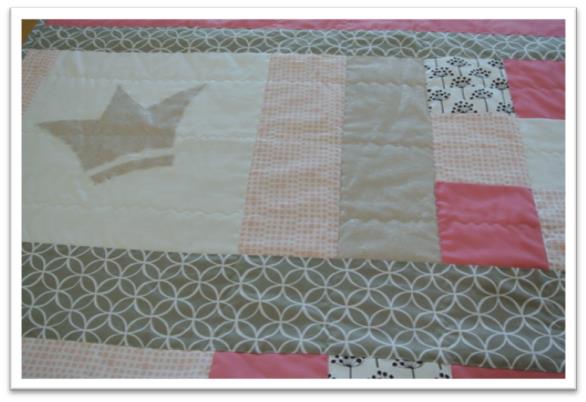
8. If you like to applique on the crown or other focal object, you can do that at this step, which is easier IMHO. Or wait until you have the back and batting in place. Either way is fine.
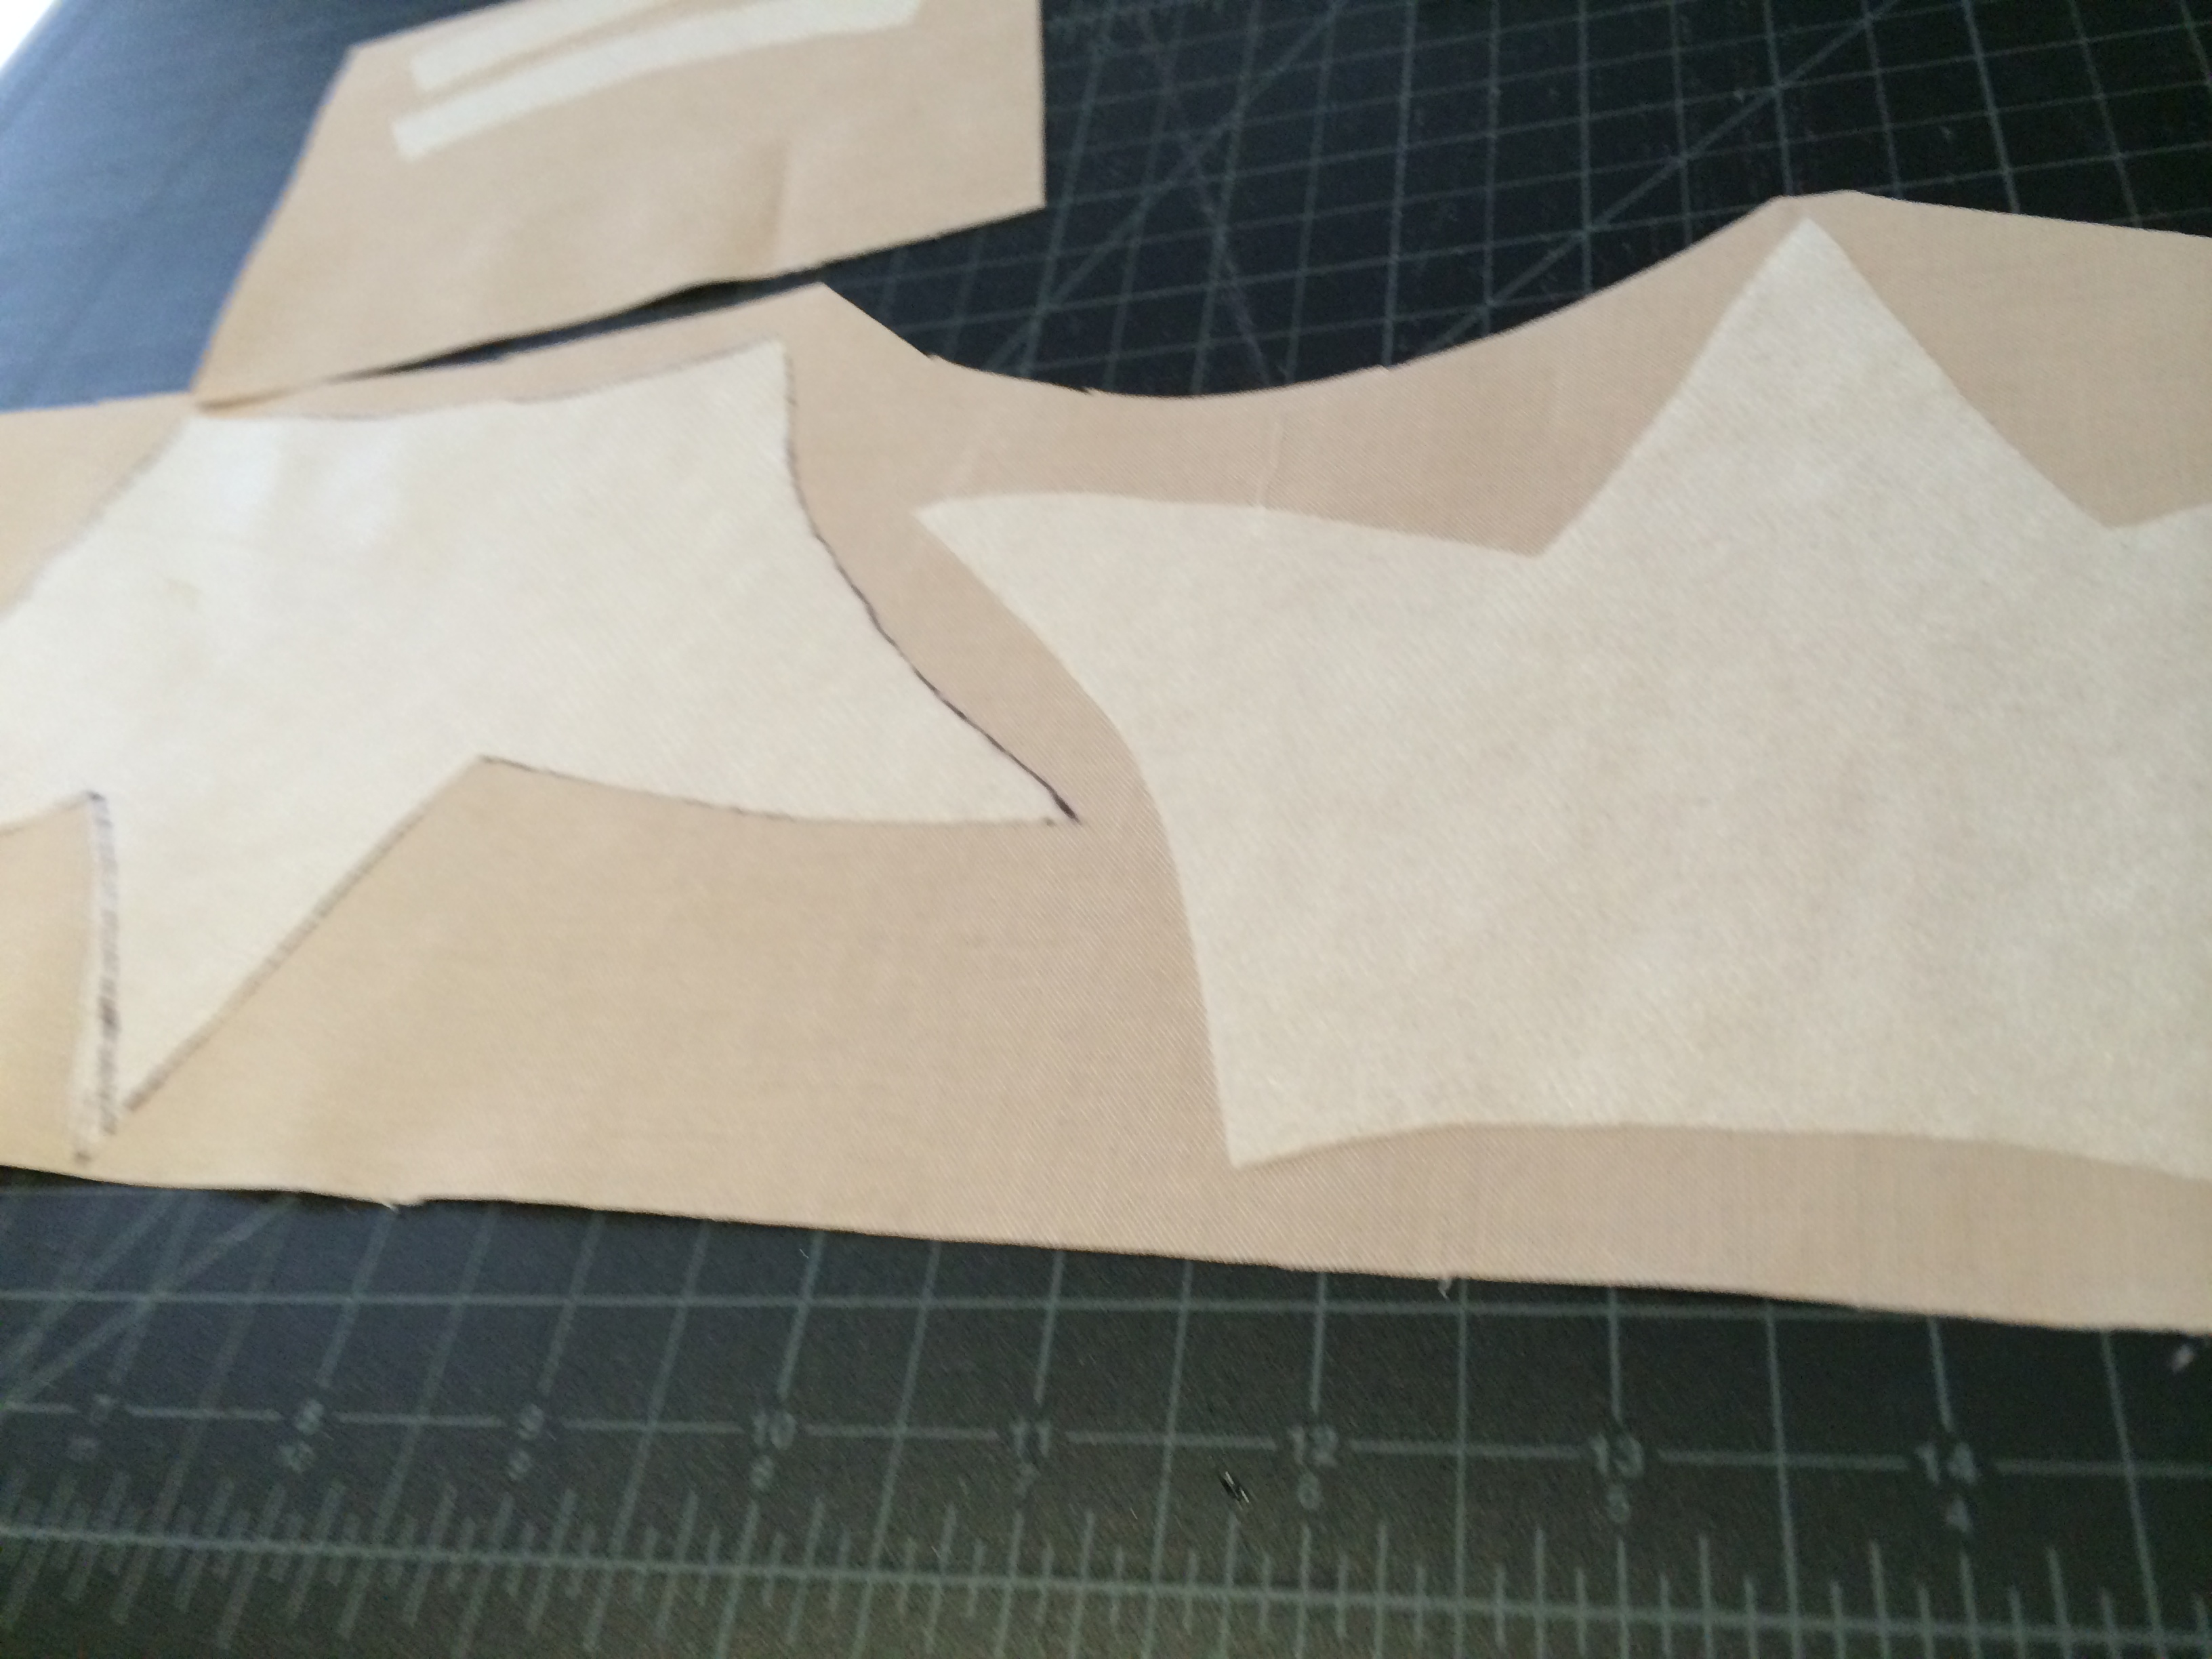
9. Trace out your focal item onto the wrong side of some iron on interfacing. Use a pencil or ball point and remember that depending on what side you trace you might end up with a reversed (mirror image). Roughly cut out your object, iron to wrong side of fabric and then cut out precisely around the lines.
10. Attach using the machine satin stich method. Basically a really tight and narrow zig zag or button hole stitch. I still finish the edge over the stitching with some fray check. 
11. Finish your quilt! Piece the backing and make the sandwich. Quilt with your favorite method.

12. Attach binding, again your favorite method, and Viola! You are all done….now you just need to muster of the strength to give it away. Sigh…… pictures last forever. Share pictures of your version too!

Here are some shots. I just couldn’t get a good straight on picture, so don’t judge me….