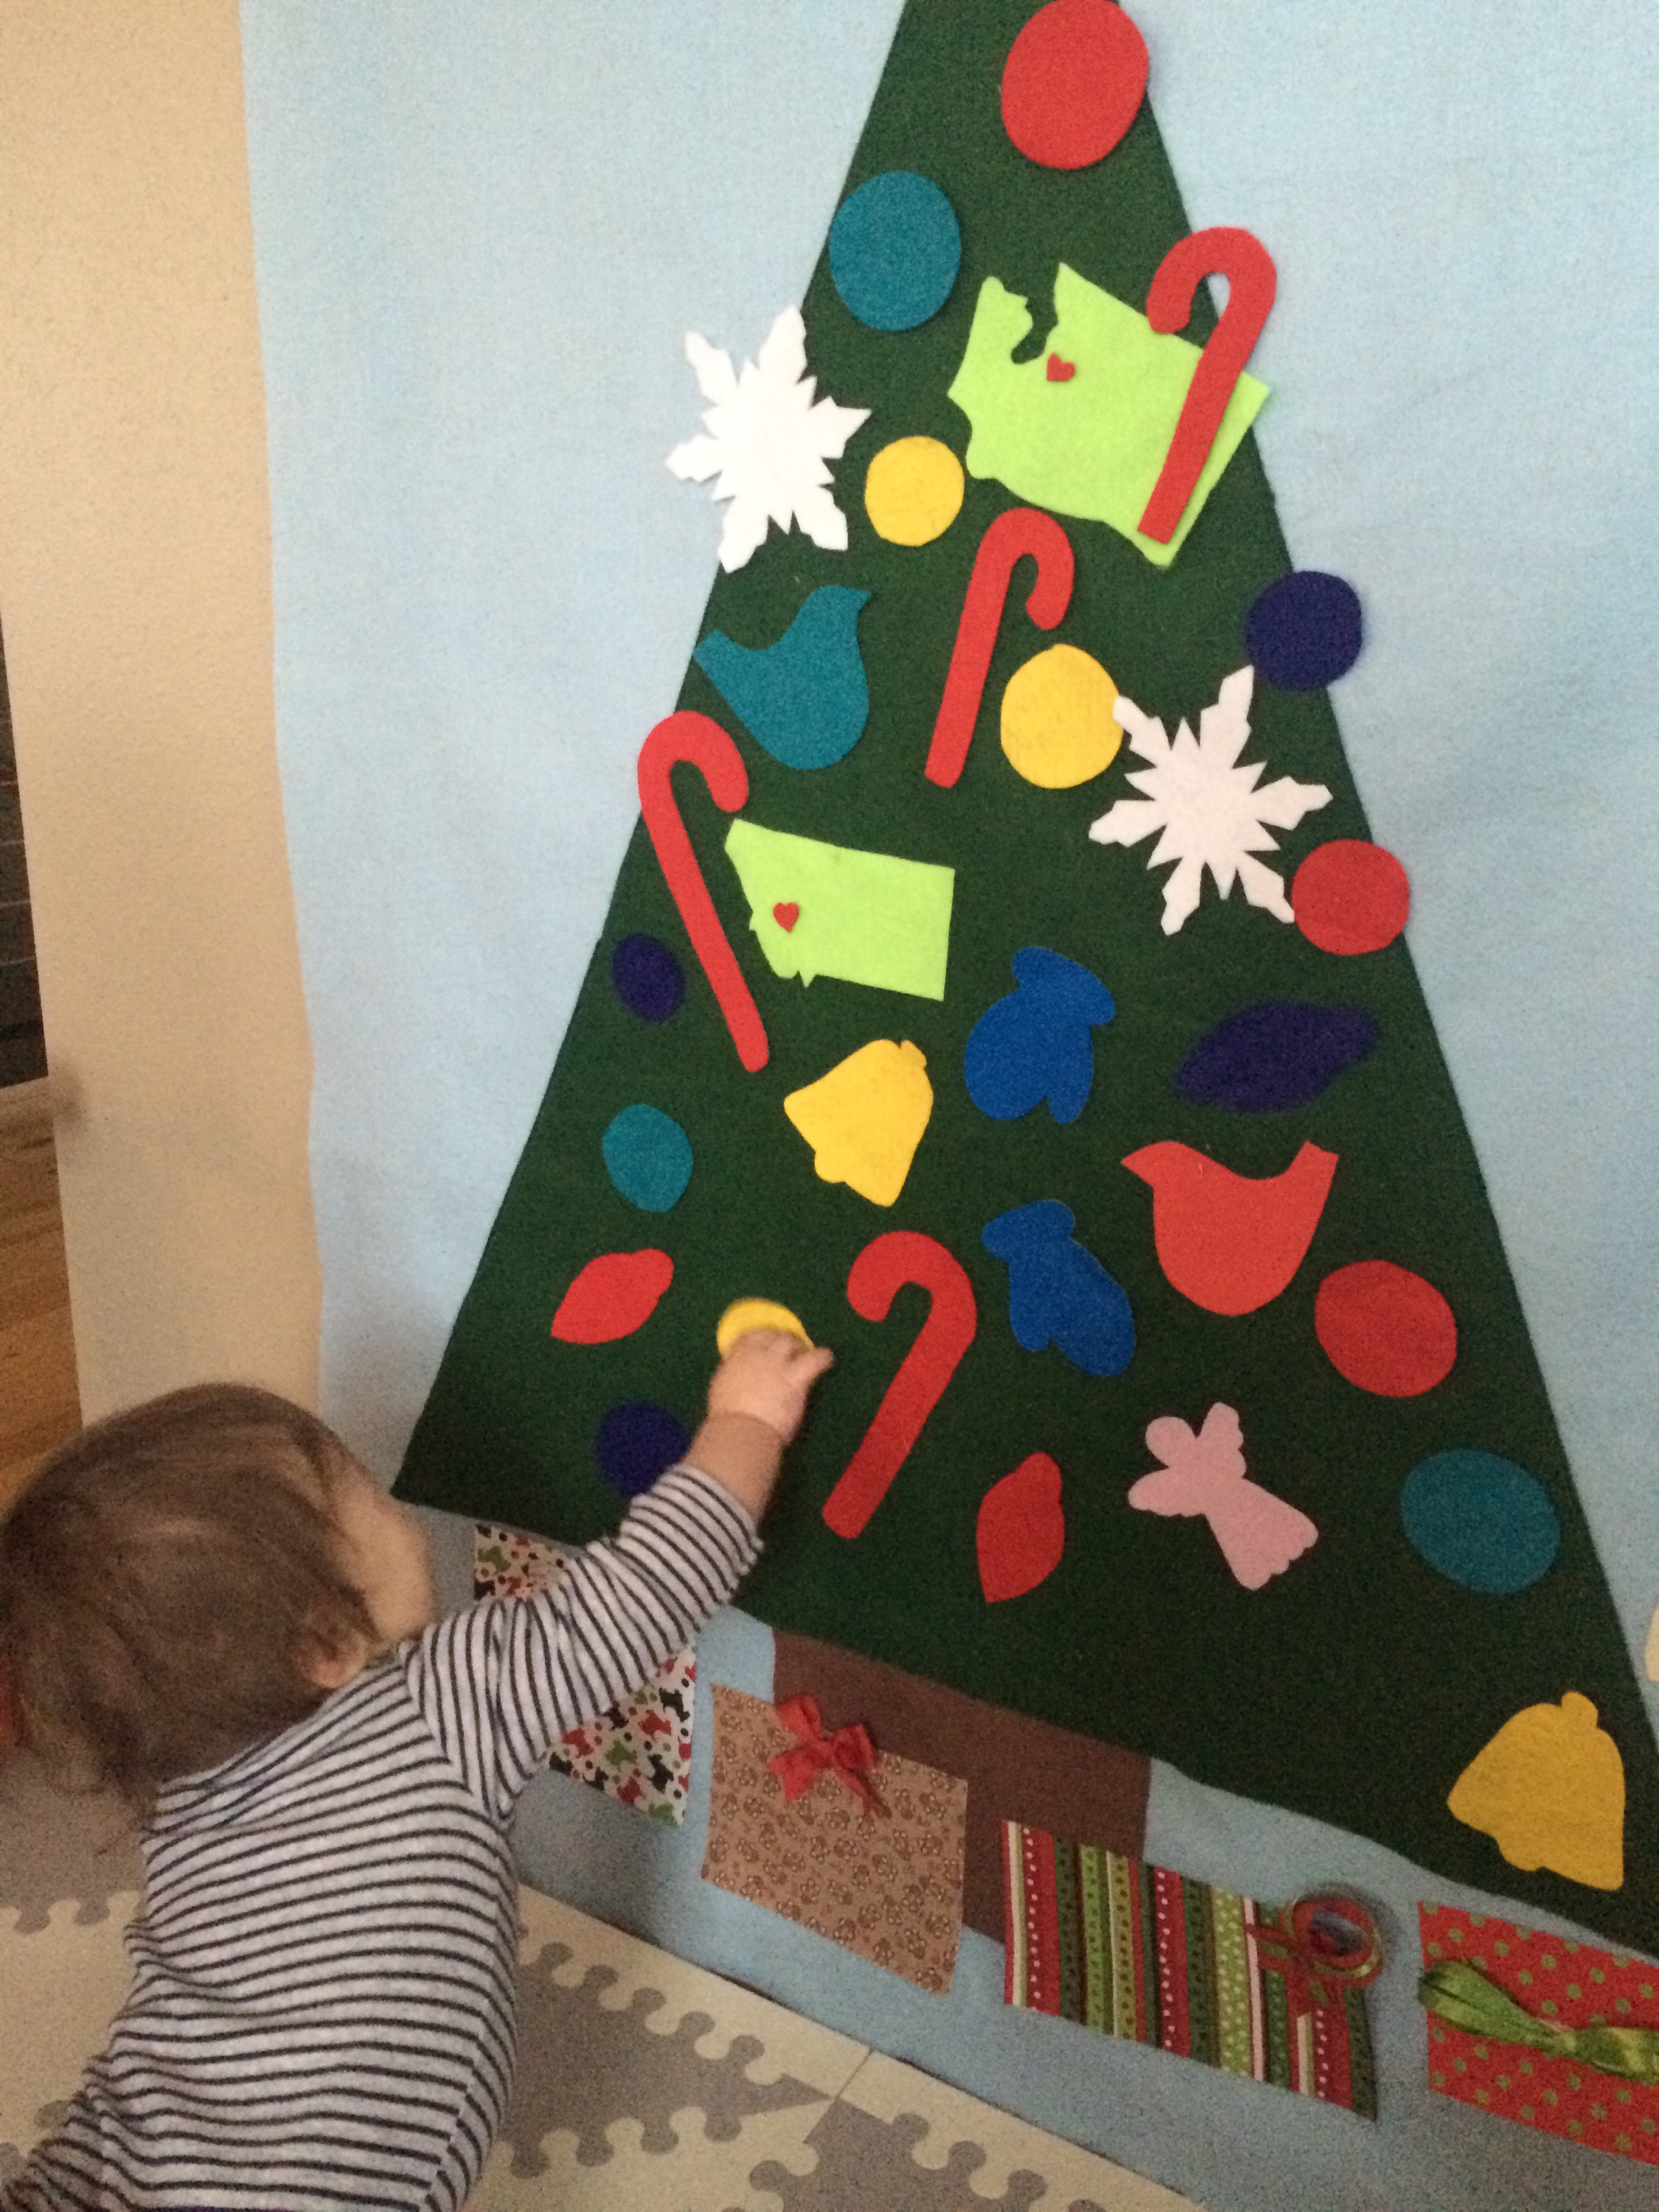
Sure these are all over Pinterest, but I still want to share my version of the felt Christmas Tree. Easy to make and the amount of time will really depend on how much detail you want to put into each ornament. I kept the ornaments simple but let the packages at the bottom be fun prints. Definitely use your craft store discount coupons to buy the big piece of felt. For this version I bought a yard of light blue for the background, a yard of the green tree and then smaller variety pack of sheets. Plenty to make a good size tree, as the felt on the bolt is really quite wide. I also picked up some half inch wood dowel for hanging, but you could also mount to the wall with velcro, tape, command strips etc.
Background and Tree: To make blue background: cut to size and then fold the top edge over about 1.5 inches and sew, creating a sleeve to slide the wooden dowel through. Just free hand draw your tree either on paper first or right onto the back side of the felt, doing the modern triangle or more classic tree outline with branches. Cut out the tree shape and position on the blue background. I put some tacky craft glue on the back of the tree to help hold it flat on background. Add a trunk if you want using brown felt. Then pin the edges of the the the tree and trunk to hold in place and sew onto the blue background with matching thread and a zig zag stitch. For the hanger, I used a length of twine tied to each end of the dowel.
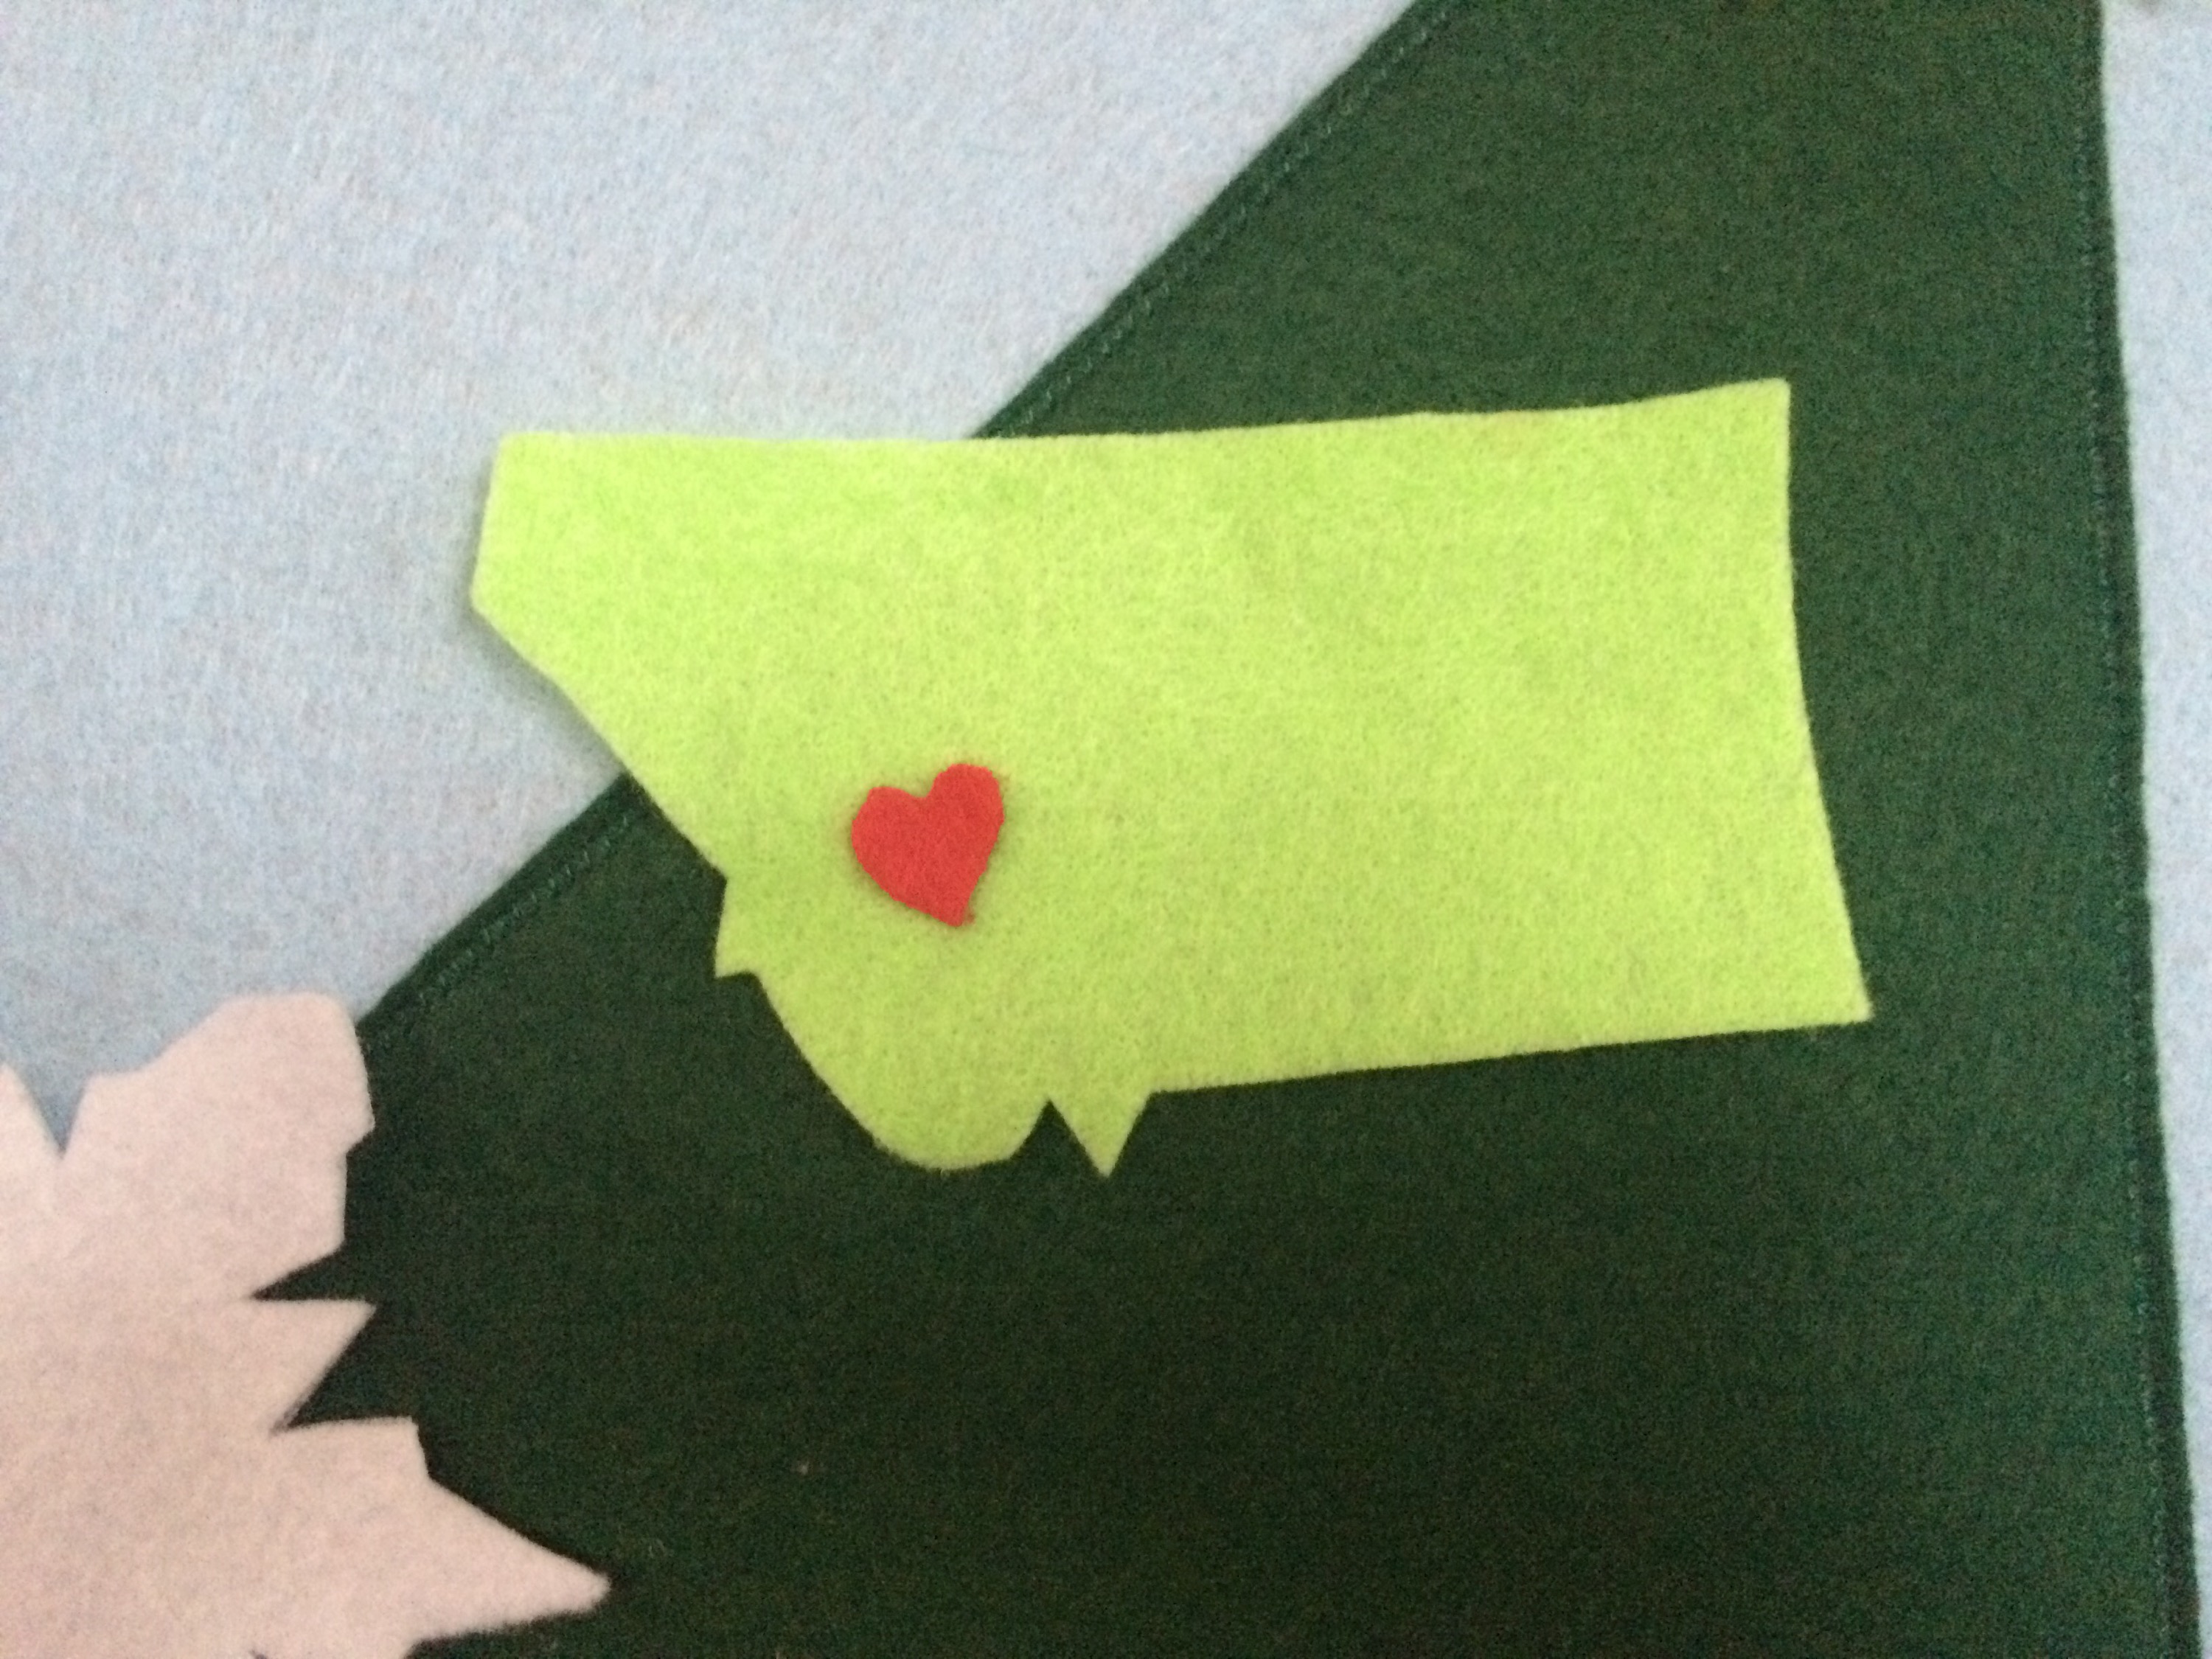
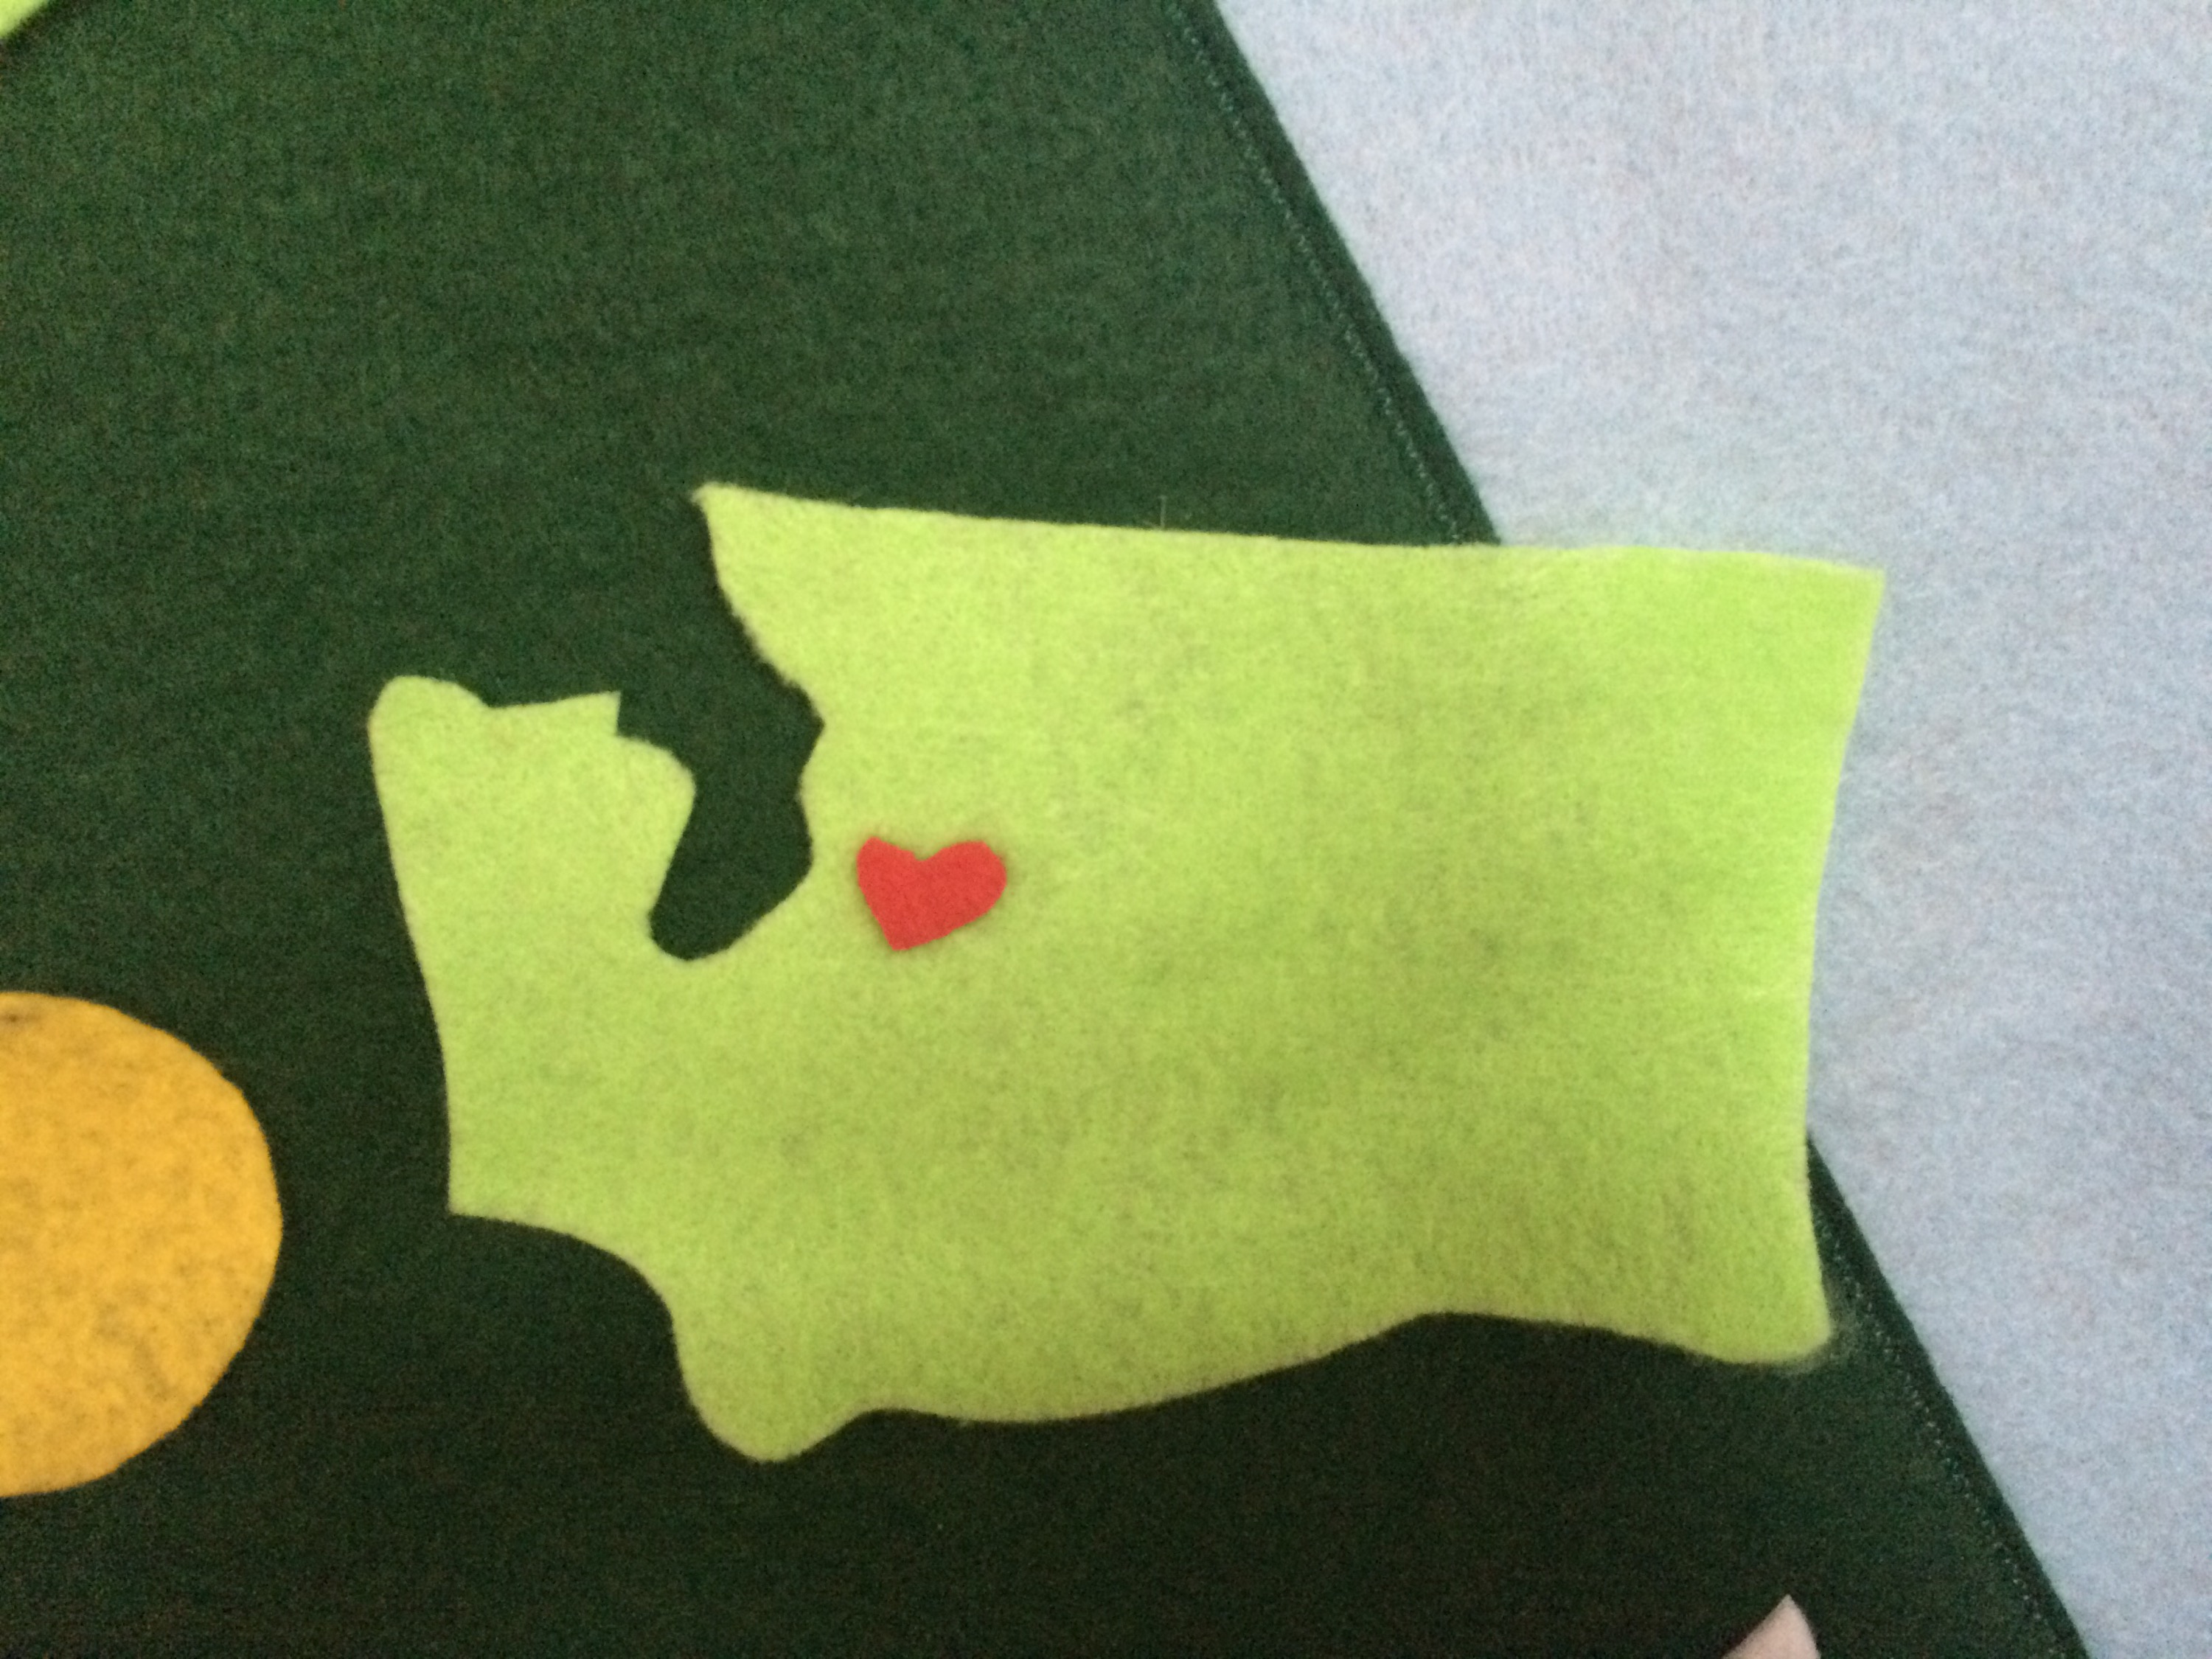
Ornaments: Have fun! I used some clip art images, traced some cookie cutters and freehand drew a few items. My favorite are the Washington and Montana state ornaments. Home is where the heart is…… Usually felt will just stick to felt but some of the thicker colored felt didn’t seem to stay quite right AND to make cutting out easier, I traced on to iron on interfacing, ironed to felt (with a piece of fabric in-between to avoid any melting) and then cut out. In hindsight I might have not ironed it on as permanent and then pealed off the interfacing when done cutting. BUT the interfacing gives the pieces a little more shape and I couldn’t peel it off without incident. For some of the easier shapes I just traced and cut or used my circle rotary cutter (‘lights’). The interfacing sticks alright to felt tree but I sprayed the backs lightly some repositionable craft adhesive (3M, Elmers or others) for some extra grabbiness. For the bows on the packages I hotglued on velcro, putting the soft side on the package and the hook side on the bow.
Hang up and enjoy! Now, we might still be a little young for unsupervised felt tree interactions, so I put some of the interfaced ornaments up out of reach (since things tend to go right in his mouth) and left the lower ornaments for his repositioning enjoyment. The circles for tree lights are my favorite and will be easy to make more of, should any end up with teeth marks.
Please share your tips and photos.