

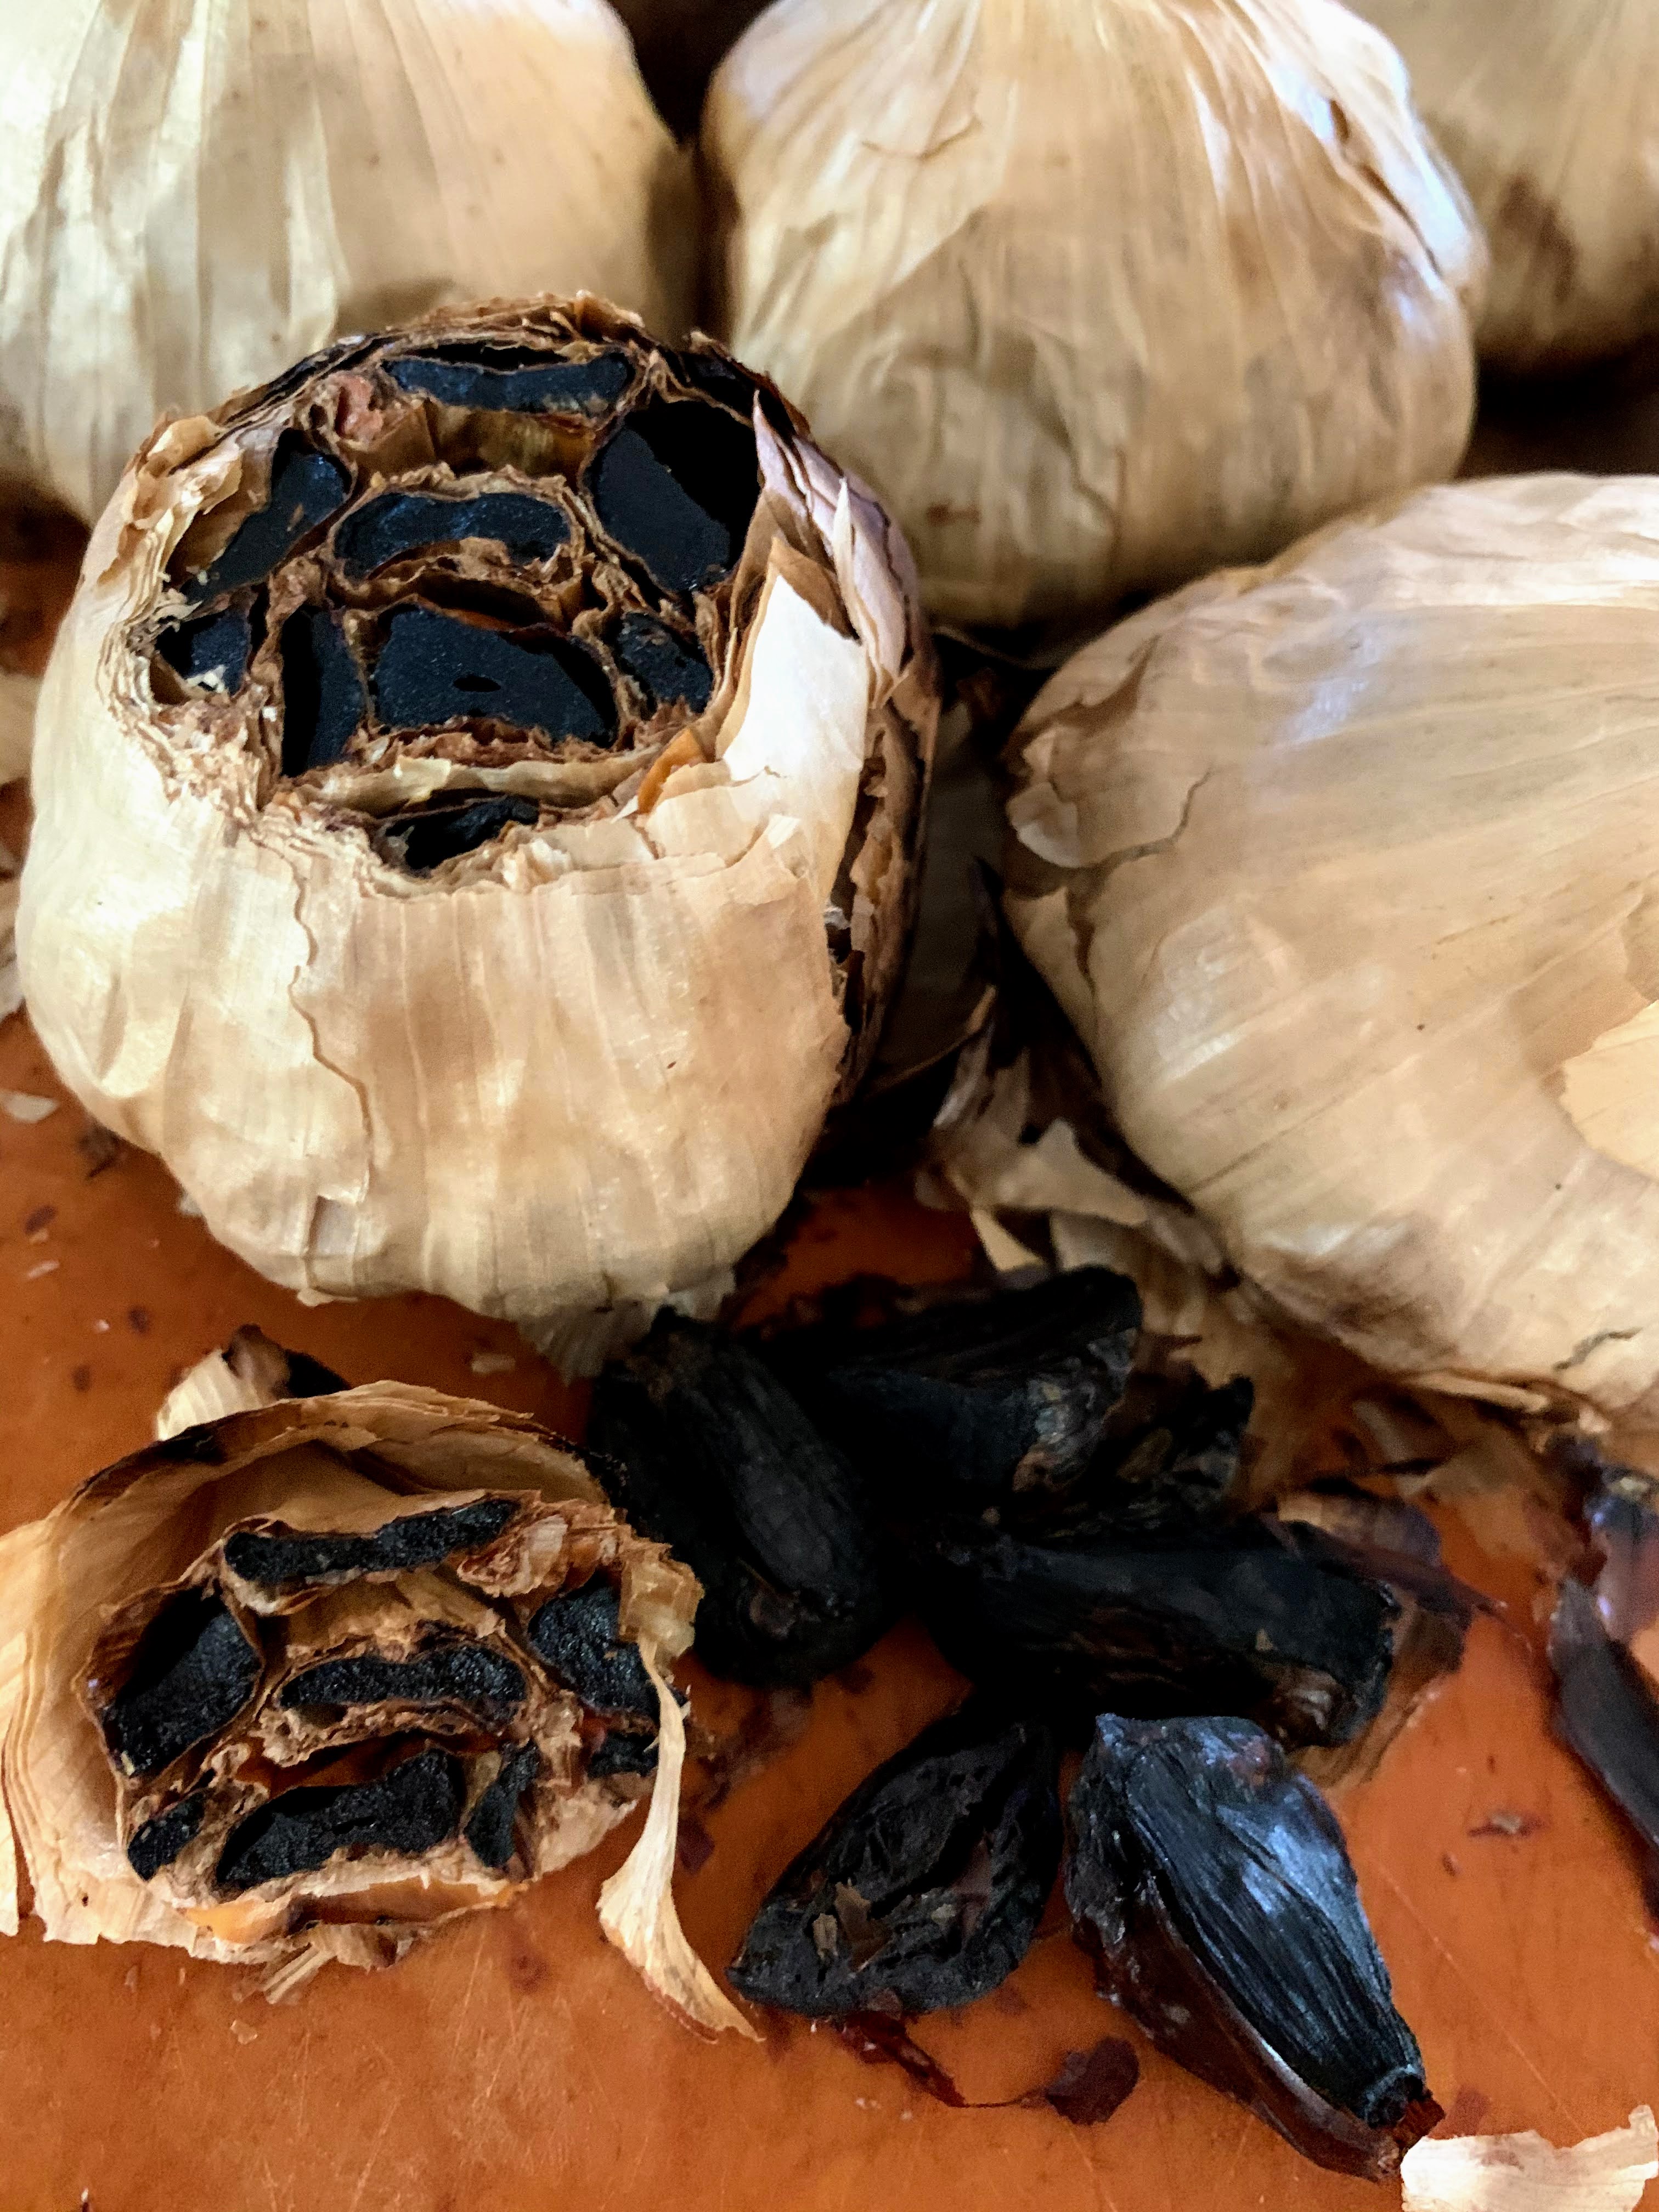
First: black garlic Is. Not. Fermented. It is caramelized or, I suppose, ‘aged’, where the Maillard process (think sear on meat) breaks down the sugar in garlic. The result of heat applied over time: savory, molasses-y garlic cloves, that are dark brown to black in color. Black garlic still retains the garlic flavor but it is mellowed a bit. Try it out as an alternative to garlic in recipes or as a new addition where you want some extra umami or depth to the flavor. When using it in lieu of garlic consider the role and timing of garlic in the recipe. Black garlic in my experience is best added towards the end of cooking or as a finishing touch or in a recipe where it won’t undergo much additional heat exposure. Think black garlic butter, fried rice (thank you Ottolenghi), grated onto pasta or in a sauce or dressing (try it in a from scratch Caesar).
Being a woman of science, I did some research how black garlic is produced (temperature, time etc), considered what I have available around the house to create the conditions and then launched into my experiment. I will put a few resources, especially the two articles that prompted me to think:
- What methods do I currently have that heat up to 60-90 C (140-190 F), ideally closer to 160F?
- Of these methods, which seem able to (safely) maintain the target temperature for 10 to 21+ days?
- How could I manage/ensure acceptable humidity?
- Where could I set this experiment up to not fumigate the whole house?
Methods considered and reason for not using:
- Current slow cooker: Designed for extended use (maybe not weeks), newer slow cookers have higher temp range, higher wattage
- Vintage slow cooker: old (decades old) slow cookers had a lower minimum temperature, unknown temp range, durability
- Pressure cooker: my stove top pressure cooker would be limited to a smaller quantity produced per batch via jar, no easy ‘Keep Warm’ setting, stove is inside, ability to maintain pressure/temp for 6+ hours
- Rice cooker: temperature range on warm would be appropriate, however unable to take out of commission as we use it several times a week
- Proofing box: I don’t have one (same for ‘yogurt maker’) I just use the oven light
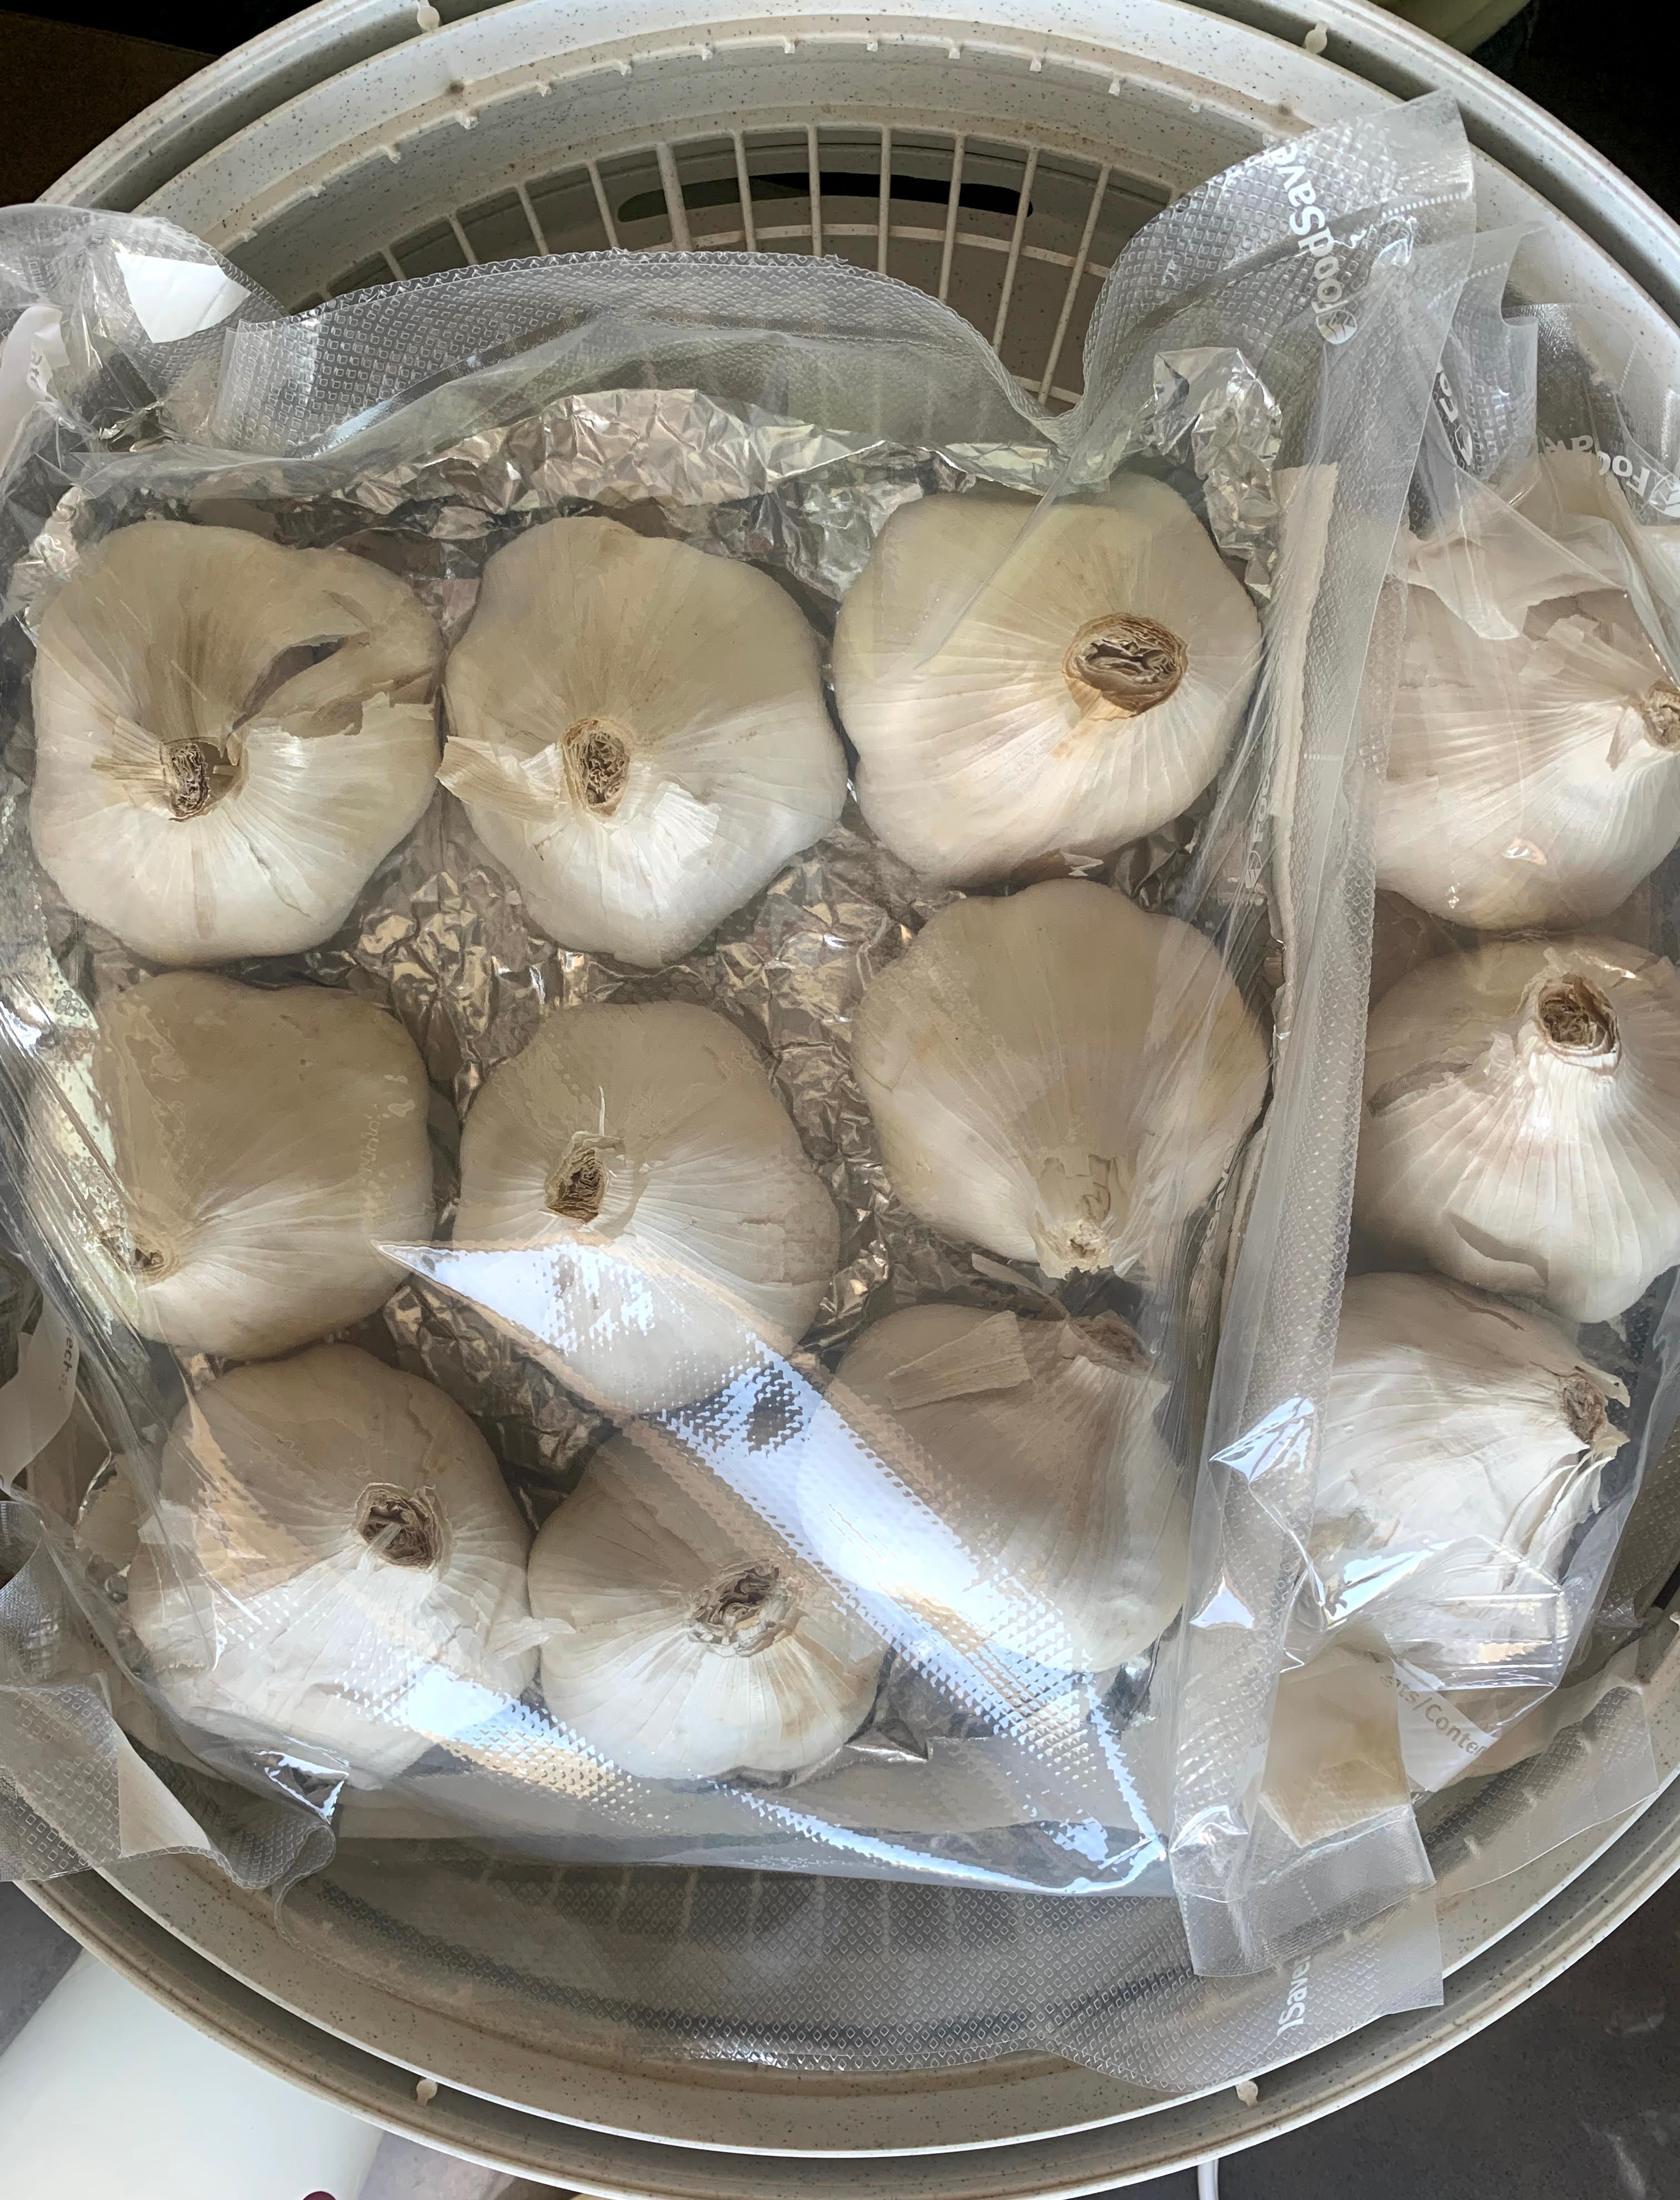
This left me with my Nesco Snackmaster food dehydrator as the final ‘thing that heats up’. And SPOILER ALERT – it works great. It has a thermostat of sorts and is designed for extended use (ok, maybe still not for weeks but I was willing to try). Also some evidence of lower wattage requirements. The catch is that it is designed for dehydrating and that is not the usual goal for black garlic, but I will say a having some dried black cloves are excellent to grate on to dishes (like you might pepper or cinnamon.) For humidity, the blubs will release some water during the process. Others note wrapping cloves in plastic wrap but I decided to use vacuum sealer bags, a little foil crinkled up a bit (keep garlic up off the bottom) and a paper towel (to absorb any pooling condensation). Bags were sealed but not vacuum packed. I briefly thought about borrowing a hygrometer and temperature probe ‘from work’ but decided to wing it.
Prep the dehydrator: In order to have space for the full garlic bulbs, I modified one of my food dehydrator trays into a spacer by clipping out the plastic woven tray/spacer. You can also buy Nesco spacers and extra trays. The extra empty tray on top kept the top/fan/heater off the wrapped bulbs and the bottom allowed for some ventilation. I didn’t want to block the vents in the base but did pack the tray tightly with garlic, in effect hindering full airflow that usually is desired in dehydrator.


With garlic ready to go, I grabbed an extension cord and took my dehydrator outside and plugged it in under the stairwell on north facing side of house. This space is protected from rain, not exposed to intense sun and is OUTSIDE. Neighborhood is now free from vampires because holy garlic odor! Did I mention to do this outside, even if sealed up in your precious rice cooker or pressure cooker, the odor will invade everything. It was July and most days had a pretty consistent temperature but this is a variable and likely added a few days to total time. Future batches of black garlic will have some added protection near/around the dehydrator to minimize drafts, without creating a fire hazard, of course. I call it a success even though it is not as exact as those beautifully controlled studies.

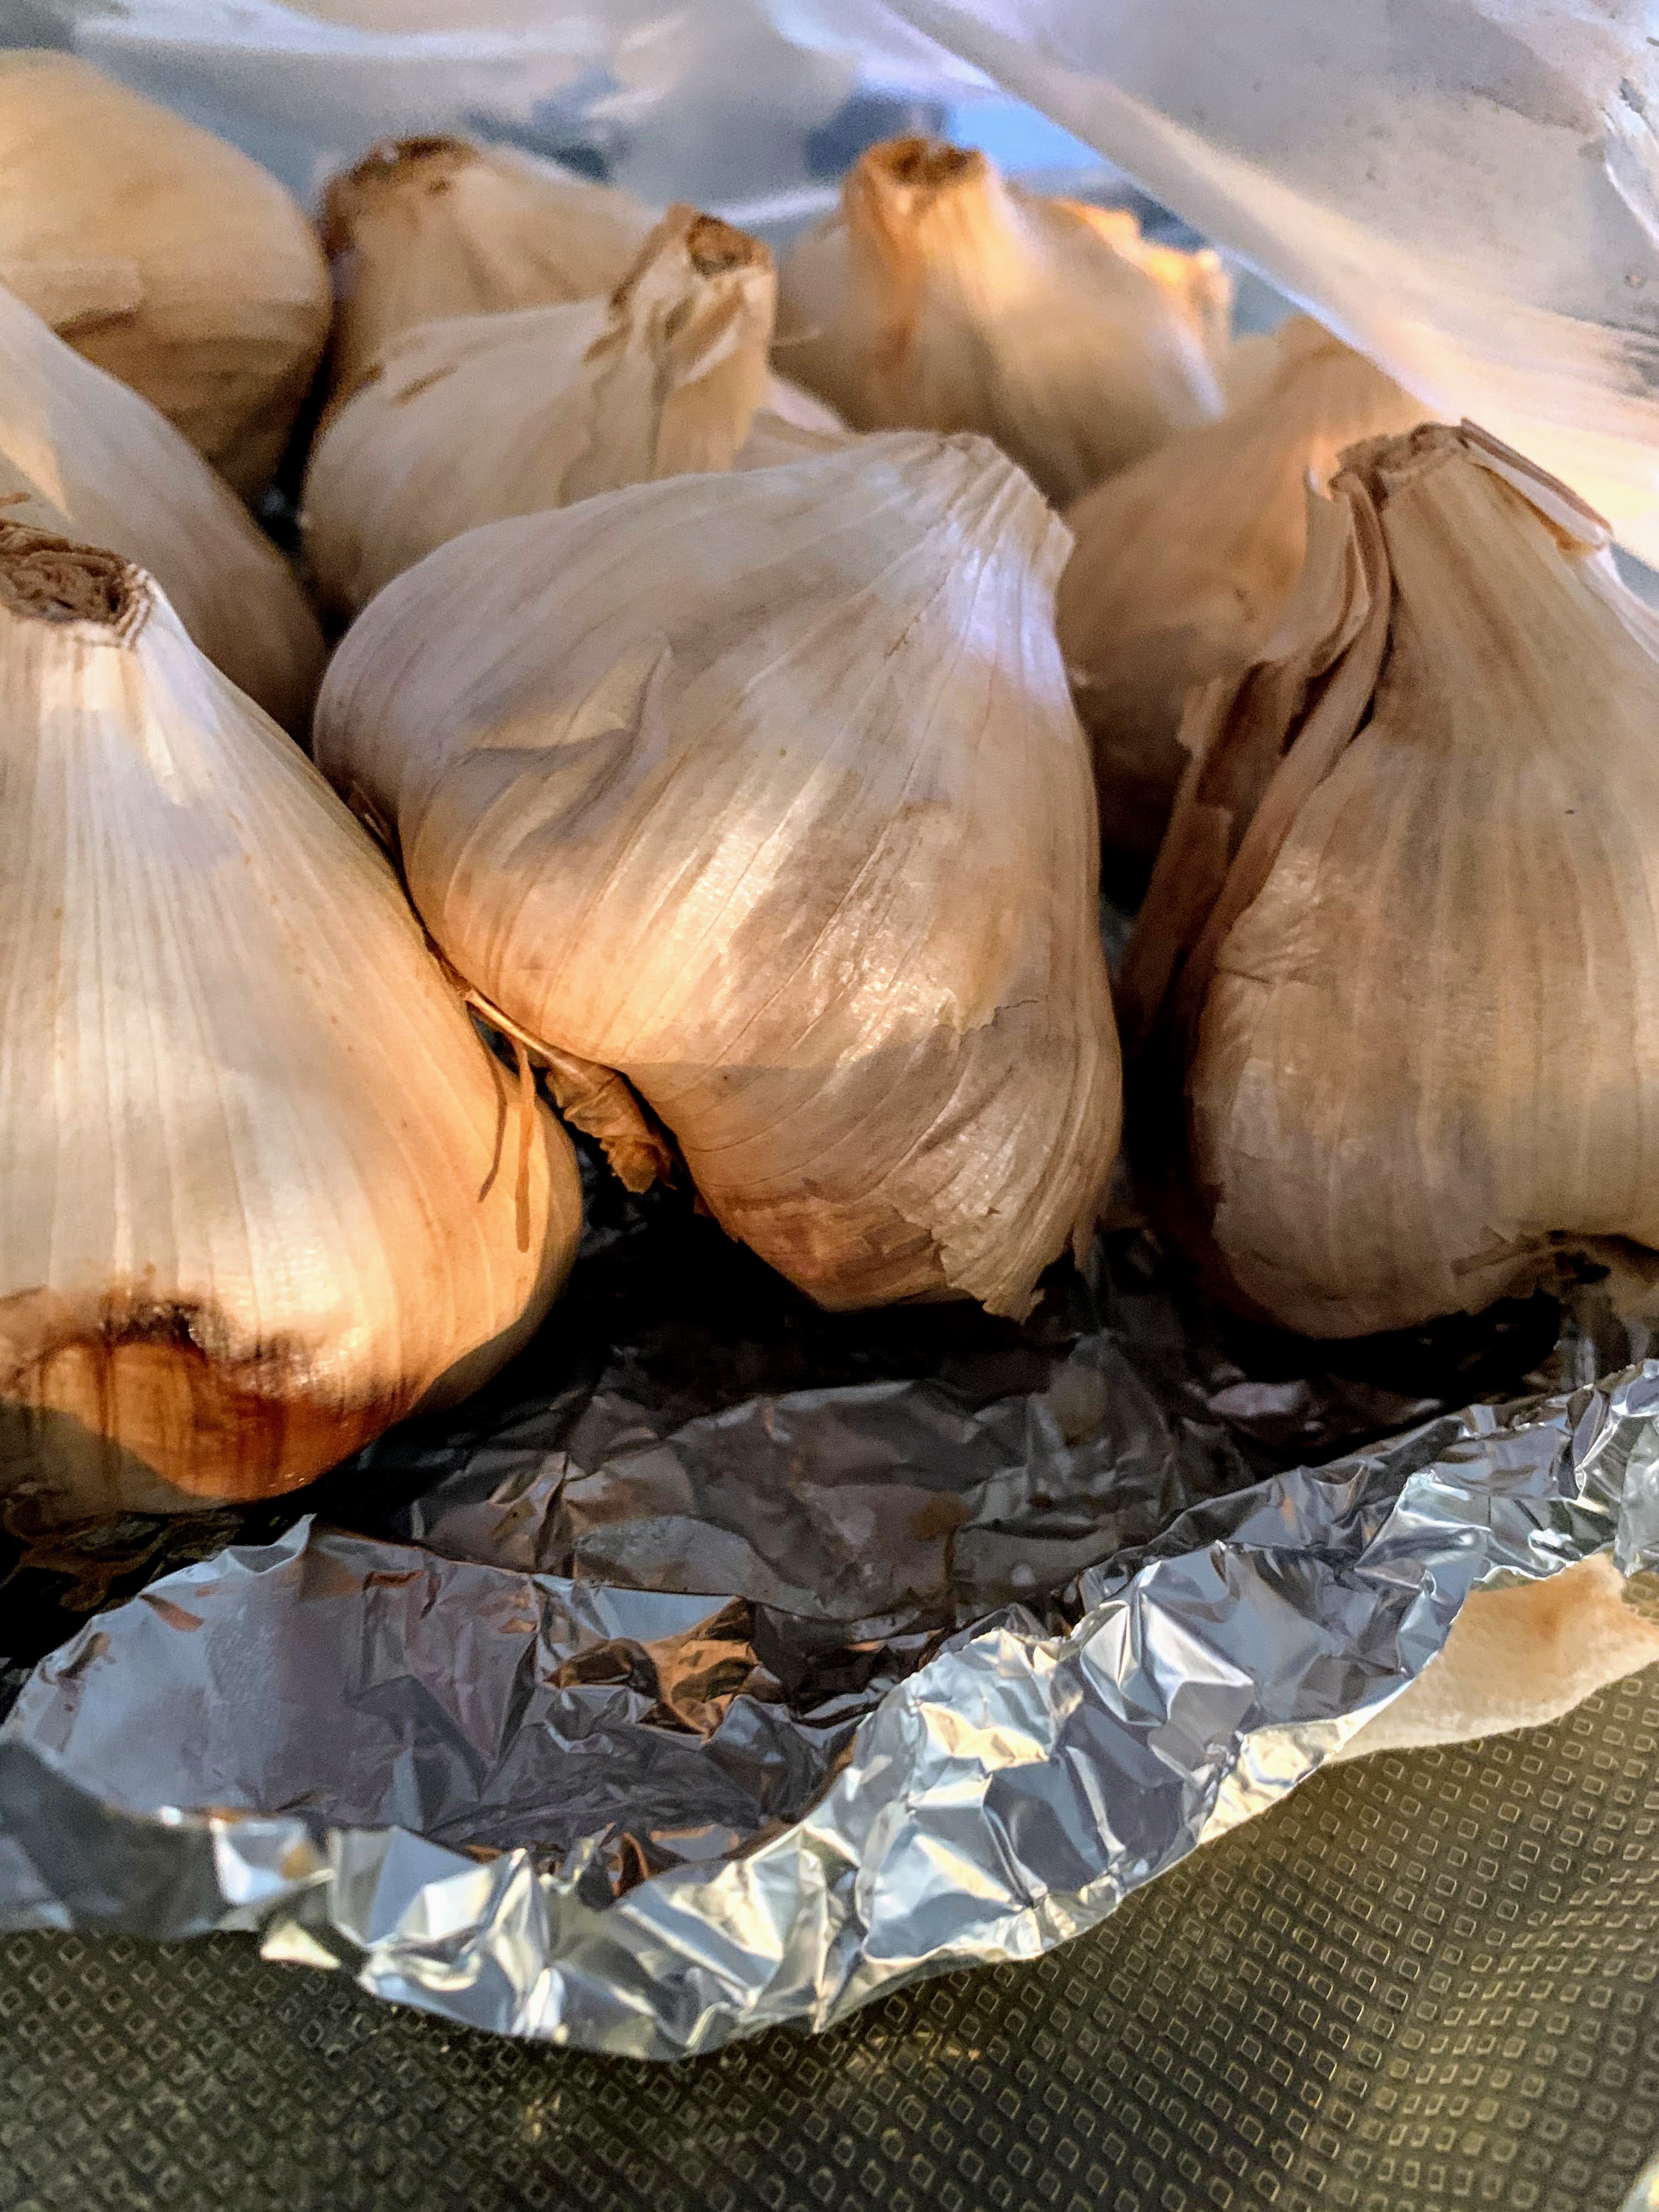
This method took about 2.5 weeks at 160 F +/- to make a dozen heads of black garlic out of some Spanish garlic bulbs from a local produce stand. It was quite intriguing to smell the change over the time from pungent garlic to the the sweeter smell as it caramelized. I checked in at day 7, 10, 14 and then almost daily till done for color, if cloves were hardening (not enough moisture) and to rotate the bulbs. I did need to wet the paper towel slightly at ~ 14 days in the smaller pack (not enough condensation) and then decided to let it dry a bit harder than the other cloves for grating. I do not regret this. Next up! Experiment with different garlic varieties and other members of the Amaryllidaceae (onion) family.


Resources:
- Kimura et al. (a treasure chest of info on optimal conditions (158-176F , and Maillard)
- Zhang et al (another deep dive on optimal conditions based on several characterists of perfect black garlic)
- Proofer method
- Dehydrator version using Excalibur and jars
