
I FINALLY dove into the pile of items in my “mend and alter” bin. Three items were in need of some basic hemming, that I thought others might be interested in my approach or be looking to follow a tutorial on. I am working on three part post, one for each hem. Segments are 1) invisible hem for dress pants 2) preserving original hem on jeans and 3) shortening a sweater dress into just a sweater. I am not a professional, but the results are good enough for me, and I am pretty picky (with some things). This is my first sewing tutorial, so feedback welcome. In reading it I can see how to do future ones better.
General approach – know what your goal of the alteration is going to be and don’t be afraid to do it…
Key point – Measure twice (or twelve), cut once OR don’t cut at all.
Invisible Hem on a Pair of Dress Pants
Background: Banana Republic Sloan fit, I have others that are the right length already, to use as patterns. They are a tad too long and require heels (and still a touch to much), but I have been trying to wear more flats. In addition, because they were just a tad long and I had worn them anyway, there is damaged piece that needed patching too.
- Lay out pants on the floor.
-
Lay second pair of pants for pattern on top, matching the crotch seam (is that the PC term?). If you don’t have then try them on and pin them up to the right length and/or measure the goal inseam.

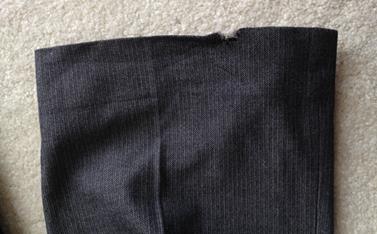
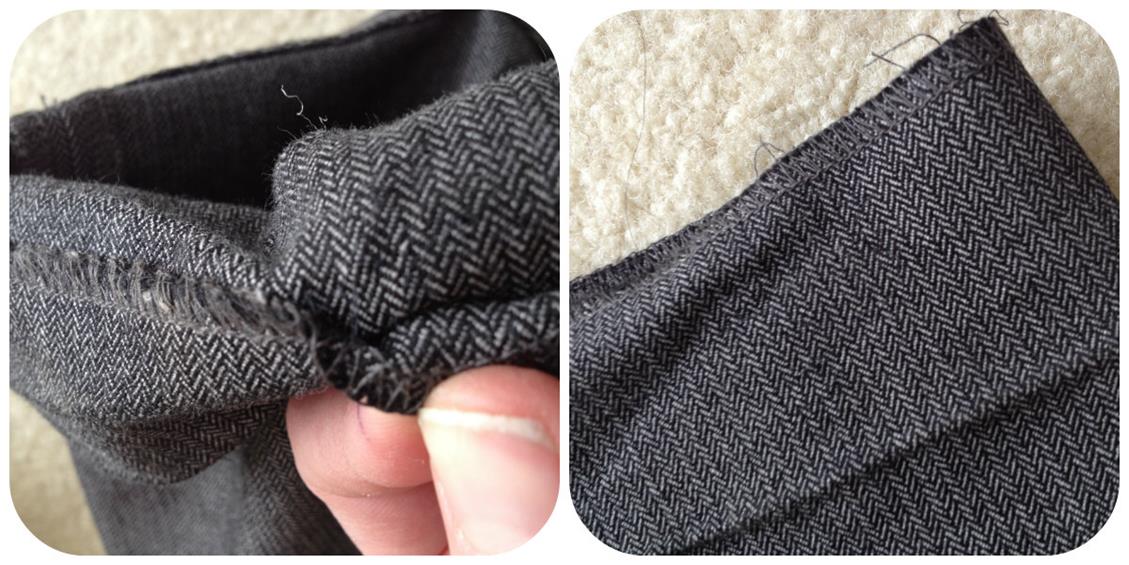
- Investigate how the hem is done on the pants, so you know how to undo it. I really try to avoid buying pants in general with a cuffed hem. They are a tad harder to alter. On this pair of pants, you can see that the hem has an overlock (serger) stitch on the raw etch to keep from fraying and then tacked with a separate stitch.
- Undue the hem with seam ripper or small sharp scissors.
- Layout pants again with pattern or tape measure to goal inseam. Note that I haven’t cut anything that can be re-done. You have a choice at this step (life is all about choices, right?). You could cut off some of the extra pant above the overlock seam and leave enough for creating a new hem. In this case, there are about 3.75 inches, so you could remove 1.5 to 2 inches or something. BUT if you cut, I would recommend finishing the new raw seam or turning under 3/8 then folding up hem. That thought alone, and knowing that turning up 3.5 inches would be ok on these pants, was enough for me to just leave it. I even had my Serger threaded for it (and if you know what a PAIN that is, you understand). You should consider how much bell or taper your pants have – when you turn them up there can be some extra, and that is ok, but if too much you probably need to cut so you aren’t cramming a 20 inch bell bottom into an 8 inch leg. Also, if skinny or taper jeans, it might be too tight to turn the bottom part in and up. Hopefully this makes sense…..
- Fold up the pant to the desired length. I just did it until it lined up with the pattern pant (black pair). In the photo to the right below you can see where the bottom of them is at (3.75) . Being able to feel it means that you now know where to pin when the time comes. Do give it a good press now to “mark” the new bottom of you pant

-
Now, the next few steps are particular to this pair of pants, since they needed some mending too.
- Locate the hole and put copious amounts of fray check around the edge
- Cut a patch out of fabric, apply wonder-under or other fusible webbing (do this step in your favorite fashion – I didn’t plan ahead and had to cut the webbing out separate and then iron, not ideal)
- Iron onto the pants on the right/outside (remember this will be turned up and inside) to affix. Notice my copious Fray check came through. Dries clear, no worries.
- Take your zig zap stitch and shorten the length so that it is close to a satin stitch and go around the edge of the patch to permanently fix over hole.
-
Done!

-
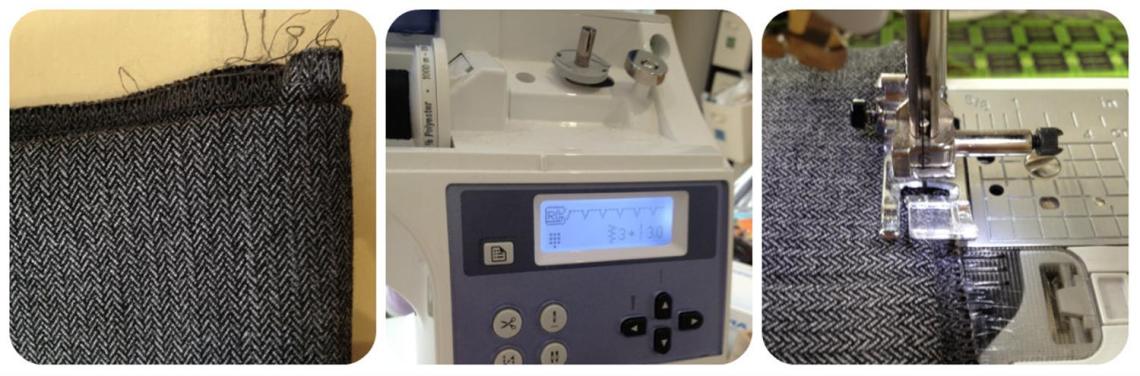
Back to hemming – now that you know your goal length, it is time to get set up for your invisible hem. It is really what it says, pretty darn hard to see. It is basically a straight stitch that darts out to the left (zags?) with stitch and then back into straight line. Many machines should have one, if not, you will need to stitch by hand (more like a whip stitch) or do a top stitch (changes the look). The goal is to just catch the fabric with the side/zag stitch. Your straight stitch will be on the part of fabric that doesn’t show and isn’t attached to anything. There will also be a special foot. I didn’t use mine, didn’t want to go have to look for it. It is adjustable left to right so you have something to line up with and also clear, for your viewing pleasure.
- The tricky part is to describe how you get your pants folded right for this. It will seem backward, because it is. You need to turn your pants inside out. Don’t worry about losing your goal, new hem, because you pressed it in real good and probably have a pin or two holding it
- With your pants inside out now, go ahead and pin all the way around your hem (don’t need to over do it) and place the pins closer to the fold than the serged end.
- Take the pinned hem and turn it inside (which is really the outside) so that you now have a new fold of fabric for the needle to catch. DO NOT press this fold. You turn the hem inside leaving the serged portion out and to the right. It is a single layer.
- Now, set your machine to the right stitch and align the pant material under the needle, starting with it on the serger part only.
-
Sew ahead slowly. It should take 3-4 straight stitches on the serged part, then jog to the left and catch the fabric fold to the left.
- The KEY is to just catch a thread or two. The less you catch the smaller and more invisible the stitch.
- Do this all the way around. If you miss one or two of the zag stitches, no worries, it will be just fine. This stitch is also nice because it forgives when there is extra material from the pants having a taper or bell.
- Voila! Turn your pants, right side out. You should really not see much, especially if you just caught a few threads and picked a good matching thread. I do have, as you can see, a few stitches that stick out more than the others. I am ok with this. I did want to point out my flaws, so you realize that I am only human too… then I went back and fixed that one really glaring stitch….After a good press (no photo), you can’t see them and besides, they are way down near the floor.
- Blind hems are great for skirts, dresses, curtains etc. Knits, cottons, denim, synthetics etc


I can’t tell from your description if you use both a serger and a sewing machine or if you did it all with a serger.
Hmm it looks like your website ate my first comment (it wwas super long) so I guess I’ll just sum
it up what I wrote and say, I’m thoroughly enjoying your
blog. I too am an aspiring blog bloggr but I’m still new to the
whole thing. Do you have any recommendations for newbie blog writers?
I’d definitely appreciate it.