
So let the sun shine in, face it with a grin.
Smilers never lose and frowners never win.
So let the sun shine in, face it with a grin
Open up your heart and let the sun shine in
A favorite song from my childhood, sung by many but the one in memory is performed by Anne Murray. Thank you Mom!
Some may poo-poo patchwork saying it is too simple or boring, but it is really about color and movement – the things that I hear many people say they struggle with. Patchwork is scalable to any size and a great way to integrate sentimental fabric or scraps. I share with you one approach to patchwork, in which the seams are offset. This accomplishes two things 1) faster to sew because you don’t have to interlock the seams flat at each intersection and 2) further helps as a blender, especially when you know you will have similar fabric “touching”. Makes it so there is never a big blob of the same print. I was also able to use up fabric that was not wide enough for a full square but great to insert to offset the row.
Select your fabric. Don’t be afraid to work in something bold, something that is more color intense or that you only have a tiny bit of.
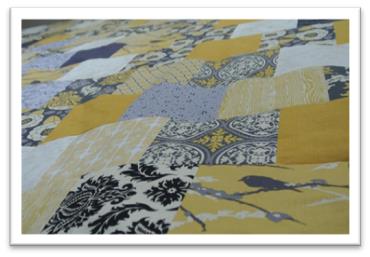
For this quilt, the “anchor fabric” is the Joel Dewberry’s Aviary 2 in Granite line. I L-O-V-E the Aviary line. In addition, I added several other items from The Stash AND cut up a dress I had sewn quite a while ago and didn’t wear anymore. Its dark grey fabric lives on!

Decide how big of a square or rectangle you want. The sizes don’t even have to all match, but chose either length or width to be the same, for sanity sake. There are lots of great quilts out there where the widths all vary and even some were within the quilt the rows vary from one to the next. LOTS of movement and really fun to make. The hardest part is ending up the same length for each row. Fortunately there are scissors to trim it all.
For this quilt with the selected fabric, the squares are 6 1/4 inches. Why not 6 ½ inches? Because a lot of the fabric was only in fat quarters and I wanted to both maximize the size of the block (the final quilt was a KING!) and number I could cut. Some of the great prints would have been lost in smaller squares. Whatever size you want to end with, add ½ inch to the final dimensions to allow for a ¼ seam on all sides (or whatever, consistent seam you want). For the pieces used to offset the rows I used varying lengths but most were about 3 5/8 by 6 1/2 inches.

Cut up your fabric! I create a key of each fabric and running count of squares, especially when you are making something that is going to require +300 squares (18 x19 squares + 19 offset pieces). This also helps you see relatively how much each print and color group you have. This is important because if you have something bold, in the case the black squares and light gray, I like to make sure they are spread out evenly over whole quilt. For this one, it is about 2 per row. I also tried to keep track of how much yardage was used.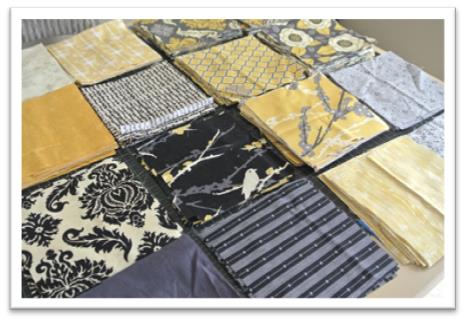

Makeup some rules for laying out quilt. You don’t really have to do this, but I like too. I attempt for gray and yellow to alternate, 2-3 black or light gray pieces per quilt. I also know that I have the most squares of the cream floral with yellow leaf piece; there is a right side up for the cream square, light yellow chandeliers, and birds. I also decided that all the wood grain, “clover” and the two with black lines will all go in a consistent direction through the quilt.
Lay the quilt out. OR just start sewing with reckless abandon. I like to lay it out and fiddle around until it is pleasing to my A/R eye.

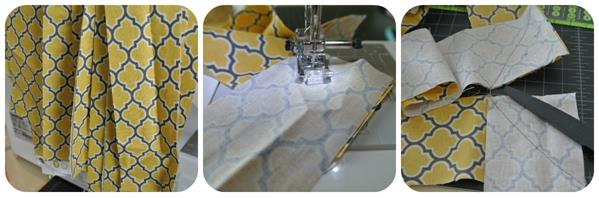
Assemble your quilt rows. Sew! Sew! Sew! Press the seams flat to in one direction.
 Be sure to take time and admire your progress. I recommend numbering your rows too. Just pin a sticky note to it or use blue tape.

Start sewing your rows together. I usually do about 3 rows at a time, and then attach those larger pieces. It just makes the quilt top a lot easier to sew and manage and also to iron as you go.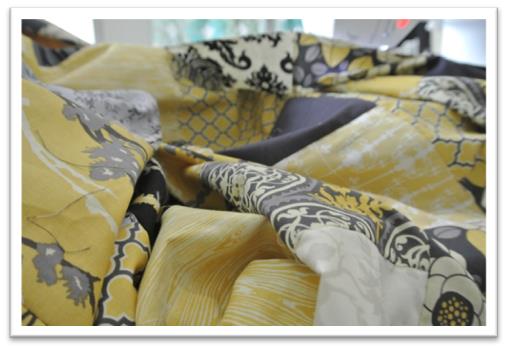

This quilt was so large, that I had to hang it over the balcony to open it up fully. It kindly shed farbee-doos (what the McIntyre women call threads and fuzz etc.) all over the room below. Farbee-doos are attracted to dog fur.


Now that the top is all assembled, it’s time to prep the back and binding and head for the finish line. For this particular quilt, I am sending out to my favorite long-arm quilter for a Warm and Natural batting and all-over stipple with matching yellow thread.
For backing quilts I usually try to use up big pieces of remaining fabric, making them scrappy. For this one, I used some linen and one piece of yellow and gray that didn’t make the cut for the front. I also added some personalization, but can’t reveal that here, as it is a surprise. Be sure to make it about 3-5 inches bigger than the top all the way around.
Cut your binding. I like to do 2 ¼ inch strips and this one also requires a ton of linear feet to bind given final dimensions are well over 110 inches. After sewing strips end to end on the diagonal (try chain piecing!), I wrap it on a piece of cardboard for organized storing.
 Side note: Do you feel tortured to fill landfills with scrap bits that are just too small or maybe not a fabric you want to see again? I make pet pillows with the scraps. Sew up a pillow on all sides, except the top and toss them all in until it is full to your liking. Mine sits right next to me at the machine.

Do you have patchwork stories?
“We do not live an equal life, but one of contrasts and patchwork; now a little joy, then a sorrow, now a sin, then a generous or brave action”. Ralph Waldo Emerson
Open up your heart and let the sunshine in. Originally written by Stuart Hamblen, 1953

I so want to learn how to quilt and have had it on the brain for awhile now lately, so your post came at a good time and these are great tips. I also love your idea for saving the tiny scraps for pet pillows, because I make dog beds and fiberfill adds up. So it solves two problems! Thanks!
Start with patchwork! it is fun and not frustrating! You can even by charm packs (pre cut squares) and get right down to the fun! I can save fabric scraps for you if you need extra. My dog can only have so many beds….
I just found out about those “layer cakes” they sell at West Seattle Fabrics (that is my neighborhood fabric store). So cool! And funny about the dog beds. Does your dog have one in every room too? My boyfriend and I keep joking that I need to stop making them because we keep ending up with more dogs. We have three right now!
I love the yellow and gray color theme, I don’t know how you find time for all your projects. My crafty side can live vicariously through your posts : ) Great Emerson quote!
Thank you! I just cram my time full of stuff. Makes me happy and I am glad others enjoy reading….